> ## Documentation Index
> Fetch the complete documentation index at: https://docs.crewai.com/llms.txt
> Use this file to discover all available pages before exploring further.
# 도구 & 통합
> 외부 앱을 연결하고 에이전트가 사용할 내부 도구를 관리하세요.
## 개요
도구 & 통합은 서드파티 애플리케이션을 연결하고 에이전트가 런타임에 사용할 내부 도구를 관리하는 중앙 허브입니다.
## 살펴보기
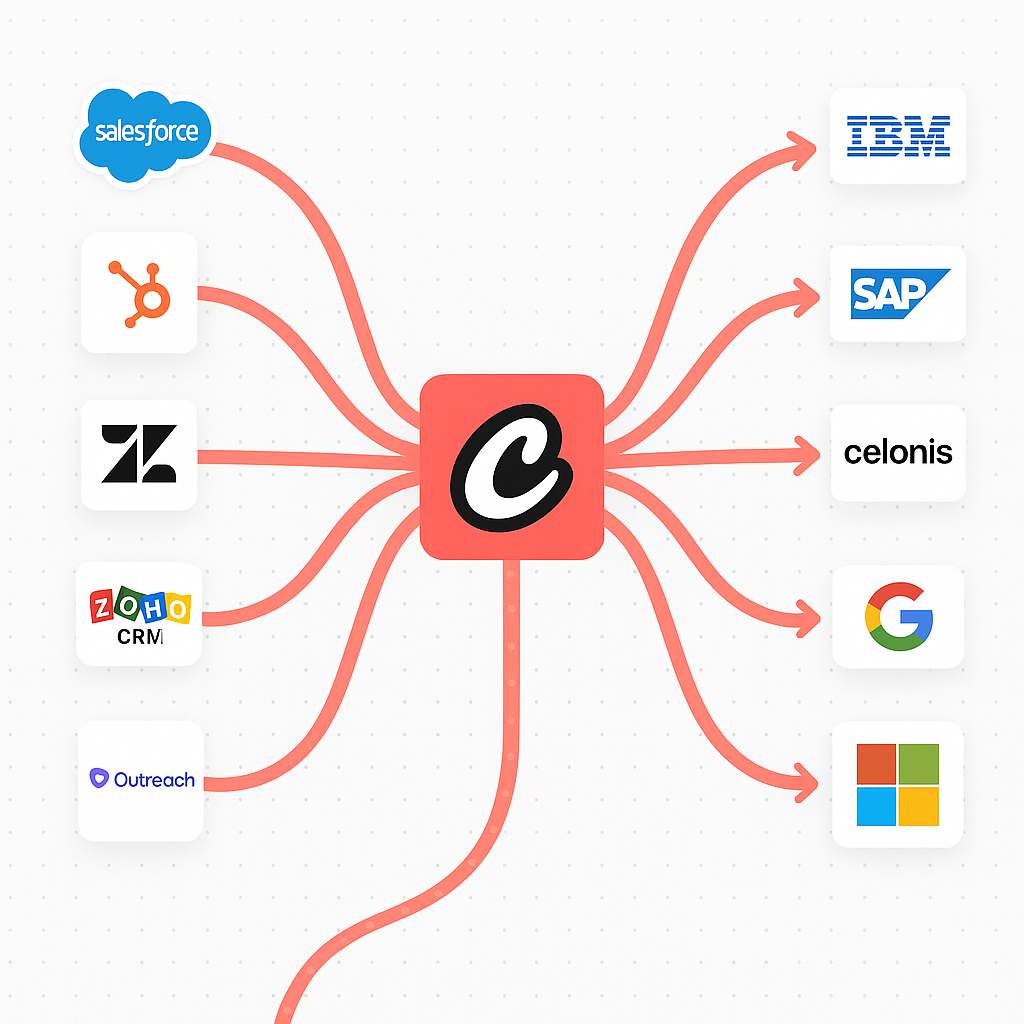
## 에이전트 앱 (통합)
Gmail, Google Drive, HubSpot, Slack 등 OAuth 기반 서비스에 연결하여 에이전트 액션을 활성화하세요.
{" "}
원하는 앱에서 Connect를 클릭하고 OAuth를 완료합니다.
필요에 따라 스코프, 트리거, 사용 가능한 액션을 조정합니다.
연결된 서비스는 에이전트 도구로 사용 가능합니다.
{" "}
### 계정 연결하기
1.
Integrations
로 이동
2. 원하는 서비스에서 Connect 클릭
3. OAuth 플로우 완료 및 스코프 승인
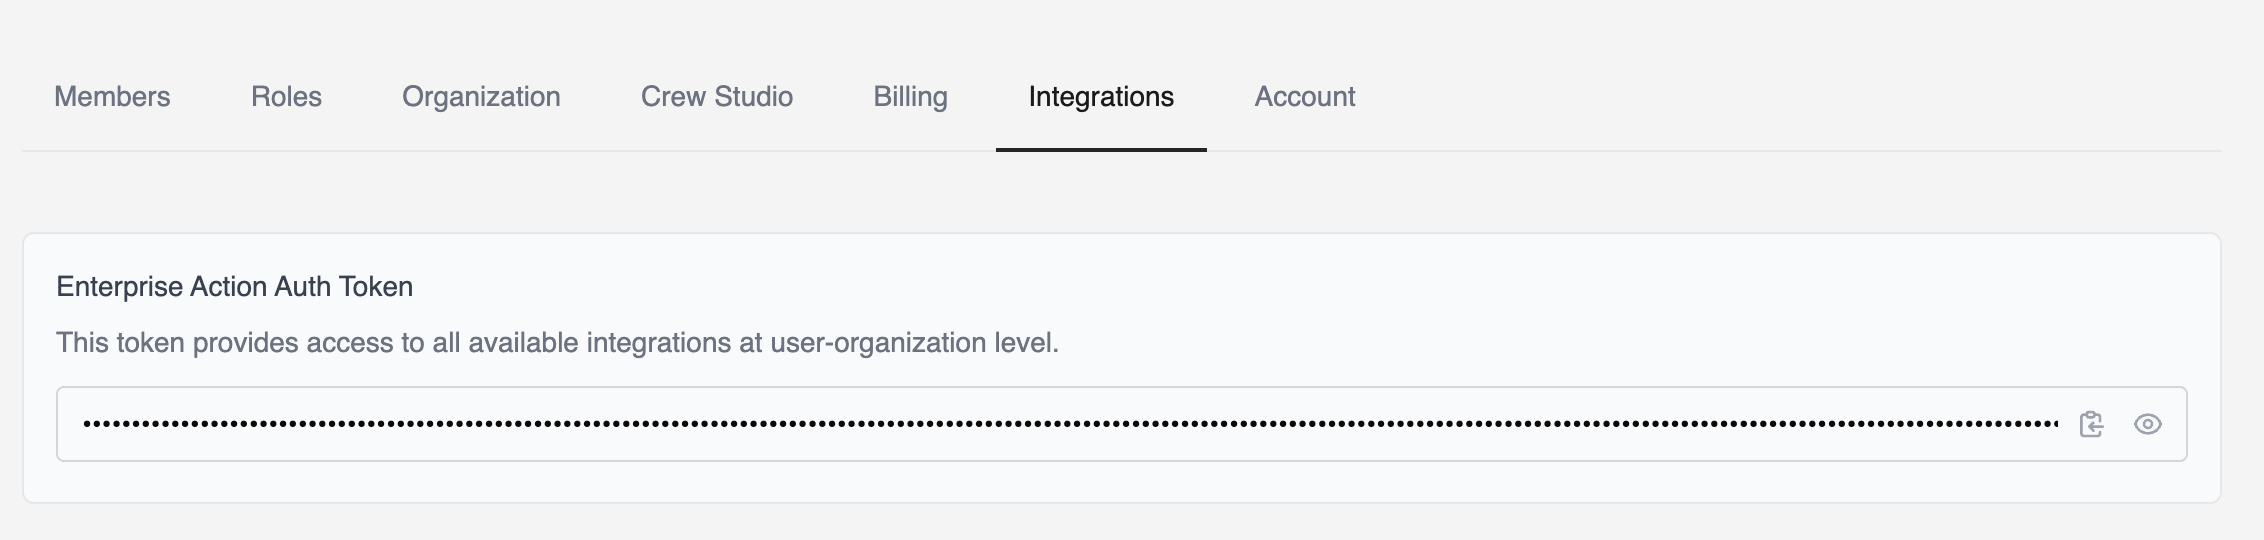
4.
통합 설정
에서 Enterprise Token 복사
{" "}
### 통합 도구 설치
로컬에서 통합을 사용하려면 최신 `crewai-tools` 패키지를 설치하세요.
```bash theme={null}
uv add crewai-tools
```
### 환경 변수 설정
{" "}
`Agent(apps=[])`와 함께 통합을 사용하려면 Enterprise Token으로
`CREWAI_PLATFORM_INTEGRATION_TOKEN` 환경 변수를 설정해야 합니다.
```bash theme={null}
export CREWAI_PLATFORM_INTEGRATION_TOKEN="your_enterprise_token"
```
또는 `.env` 파일에 추가하세요:
```
CREWAI_PLATFORM_INTEGRATION_TOKEN=your_enterprise_token
```
### 사용 예시
{" "}
새로운 간소화된 접근 방식을 사용하여 엔터프라이즈 앱을 통합하세요. Agent
구성에서 앱과 해당 액션을 직접 지정하기만 하면 됩니다.
```python theme={null}
from crewai import Agent, Task, Crew
# Gmail 기능을 가진 에이전트 생성
email_agent = Agent(
role="이메일 매니저",
goal="이메일 커뮤니케이션 관리",
backstory="이메일 관리에 특화된 AI 어시스턴트",
apps=['gmail', 'gmail/send_email'] # 정식 이름 'gmail' 사용
)
email_task = Task(
description="프로젝트 업데이트에 대한 후속 이메일 작성 및 전송",
agent=email_agent,
expected_output="이메일 전송 성공 확인"
)
crew = Crew(agents=[email_agent], tasks=[email_task])
crew.kickoff()
```
### 도구 필터링
```python theme={null}
from crewai import Agent, Task, Crew
# 특정 Gmail 액션만 사용하는 에이전트 생성
gmail_agent = Agent(
role="Gmail 매니저",
goal="Gmail 커뮤니케이션 및 알림 관리",
backstory="Gmail 커뮤니케이션 조율 AI 어시스턴트",
apps=['gmail/fetch_emails'] # 정식 이름과 특정 액션 사용
)
notification_task = Task(
description="john@example.com에서 온 이메일 찾기",
agent=gmail_agent,
expected_output="john@example.com의 이메일을 찾았다는 확인"
)
crew = Crew(agents=[gmail_agent], tasks=[notification_task])
```
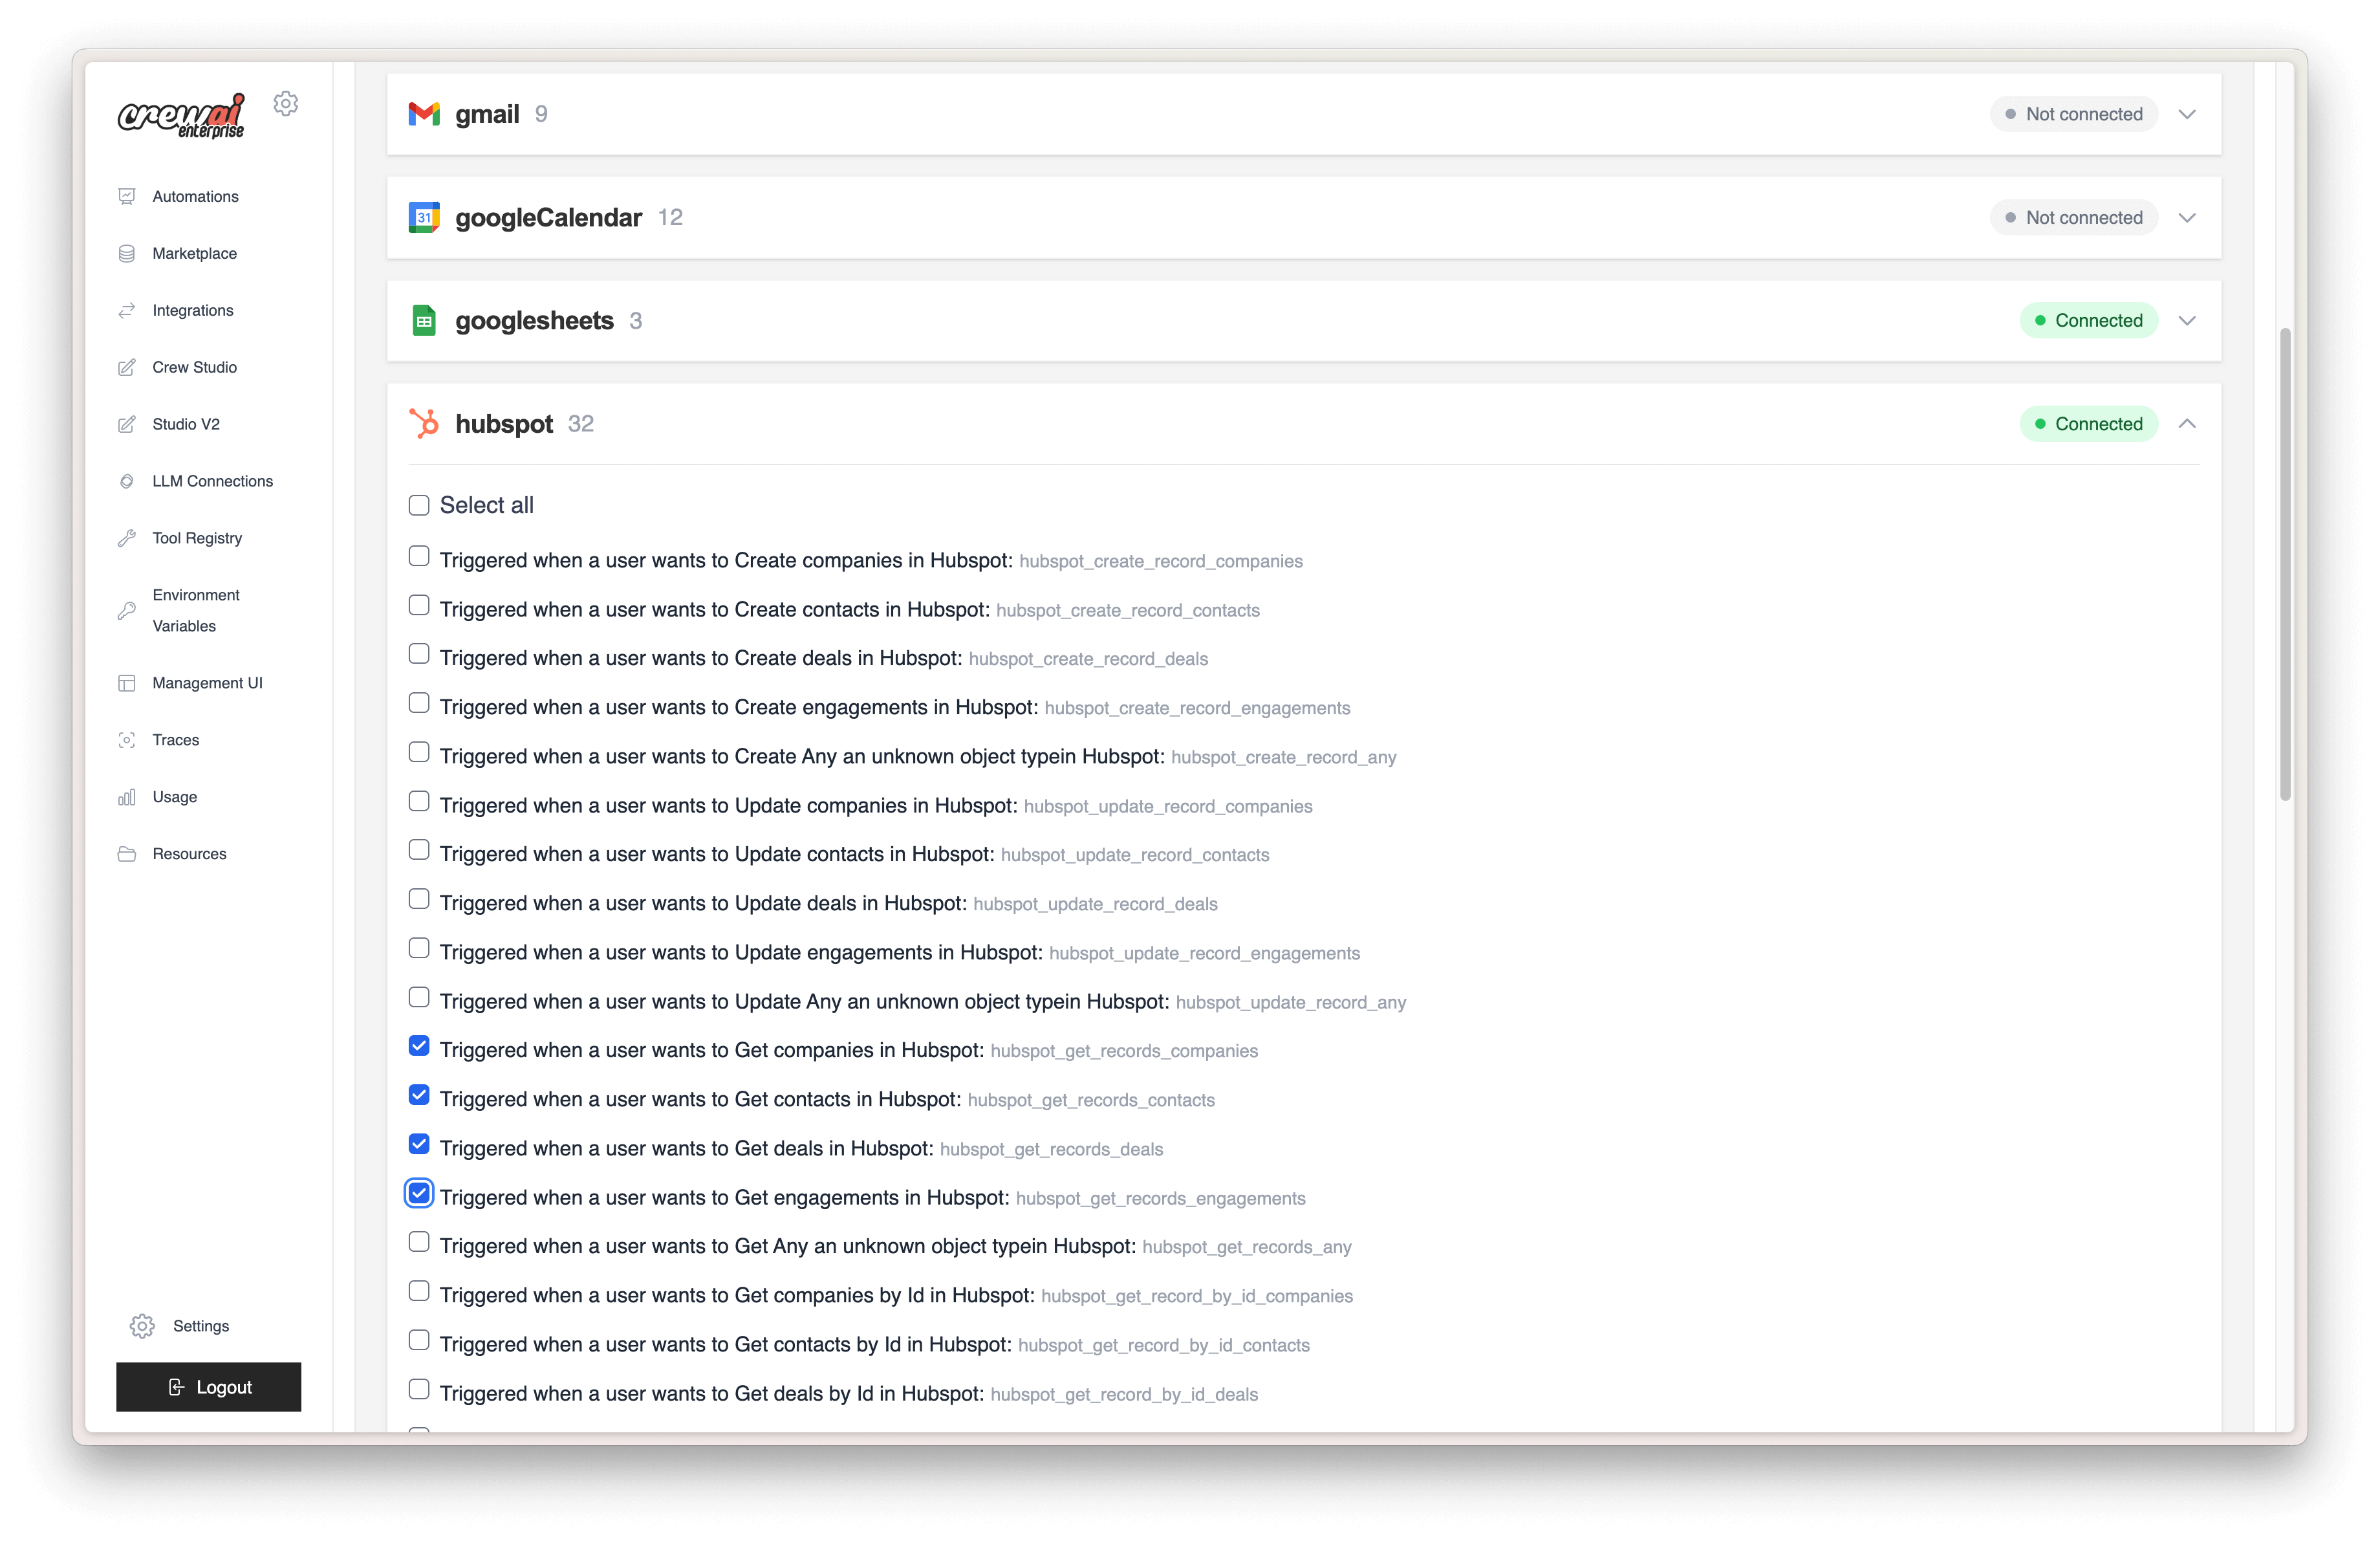
배포된 크루에서는 각 통합의 서비스 설정 페이지에서 사용 가능한 액션을 지정할 수 있습니다.
{" "}
### 범위 지정 배포 (다중 사용자 조직)
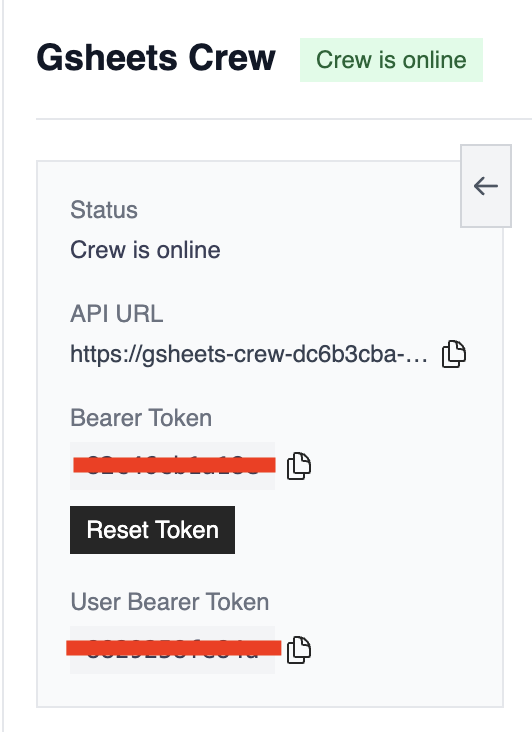
각 통합을 특정 사용자로 범위 지정할 수 있습니다 (예: 특정 사용자의 Gmail 계정 사용).
{" "}
팀/사용자별 데이터 접근을 분리해야 할 때 유용합니다.
`user_bearer_token`을 사용해 요청 사용자로 인증을 범위 지정합니다. 사용자가 로그인하지 않은 경우 연결된 통합을 사용하지 않으며, 그렇지 않으면 배포에 설정된 기본 토큰을 사용합니다.
{" "}
{" "}
### 카탈로그
#### 커뮤니케이션 & 협업
* Gmail — 이메일 및 초안 관리
* Slack — 워크스페이스 알림 및 경보
* Microsoft — Office 365 및 Teams 통합
#### 프로젝트 관리
* Jira — 이슈 추적 및 프로젝트 관리
* ClickUp — 작업 및 생산성 관리
* Asana — 팀 작업 조율
* Notion — 페이지 및 데이터베이스 관리
* Linear — 버그/프로젝트 추적
* GitHub — 리포지토리 및 이슈 관리
#### CRM
* Salesforce — 계정 및 기회 관리
* HubSpot — 파이프라인/연락처 관리
* Zendesk — 고객 지원 티켓 관리
#### 비즈니스 & 금융
* Stripe — 결제 처리 및 고객 관리
* Shopify — 전자상거래 및 상품 관리
#### 생산성 & 스토리지
* Google Sheets — 스프레드시트 동기화
* Google Calendar — 일정/이벤트 관리
* Box — 파일 스토리지
…더 많은 통합이 추가될 예정입니다!
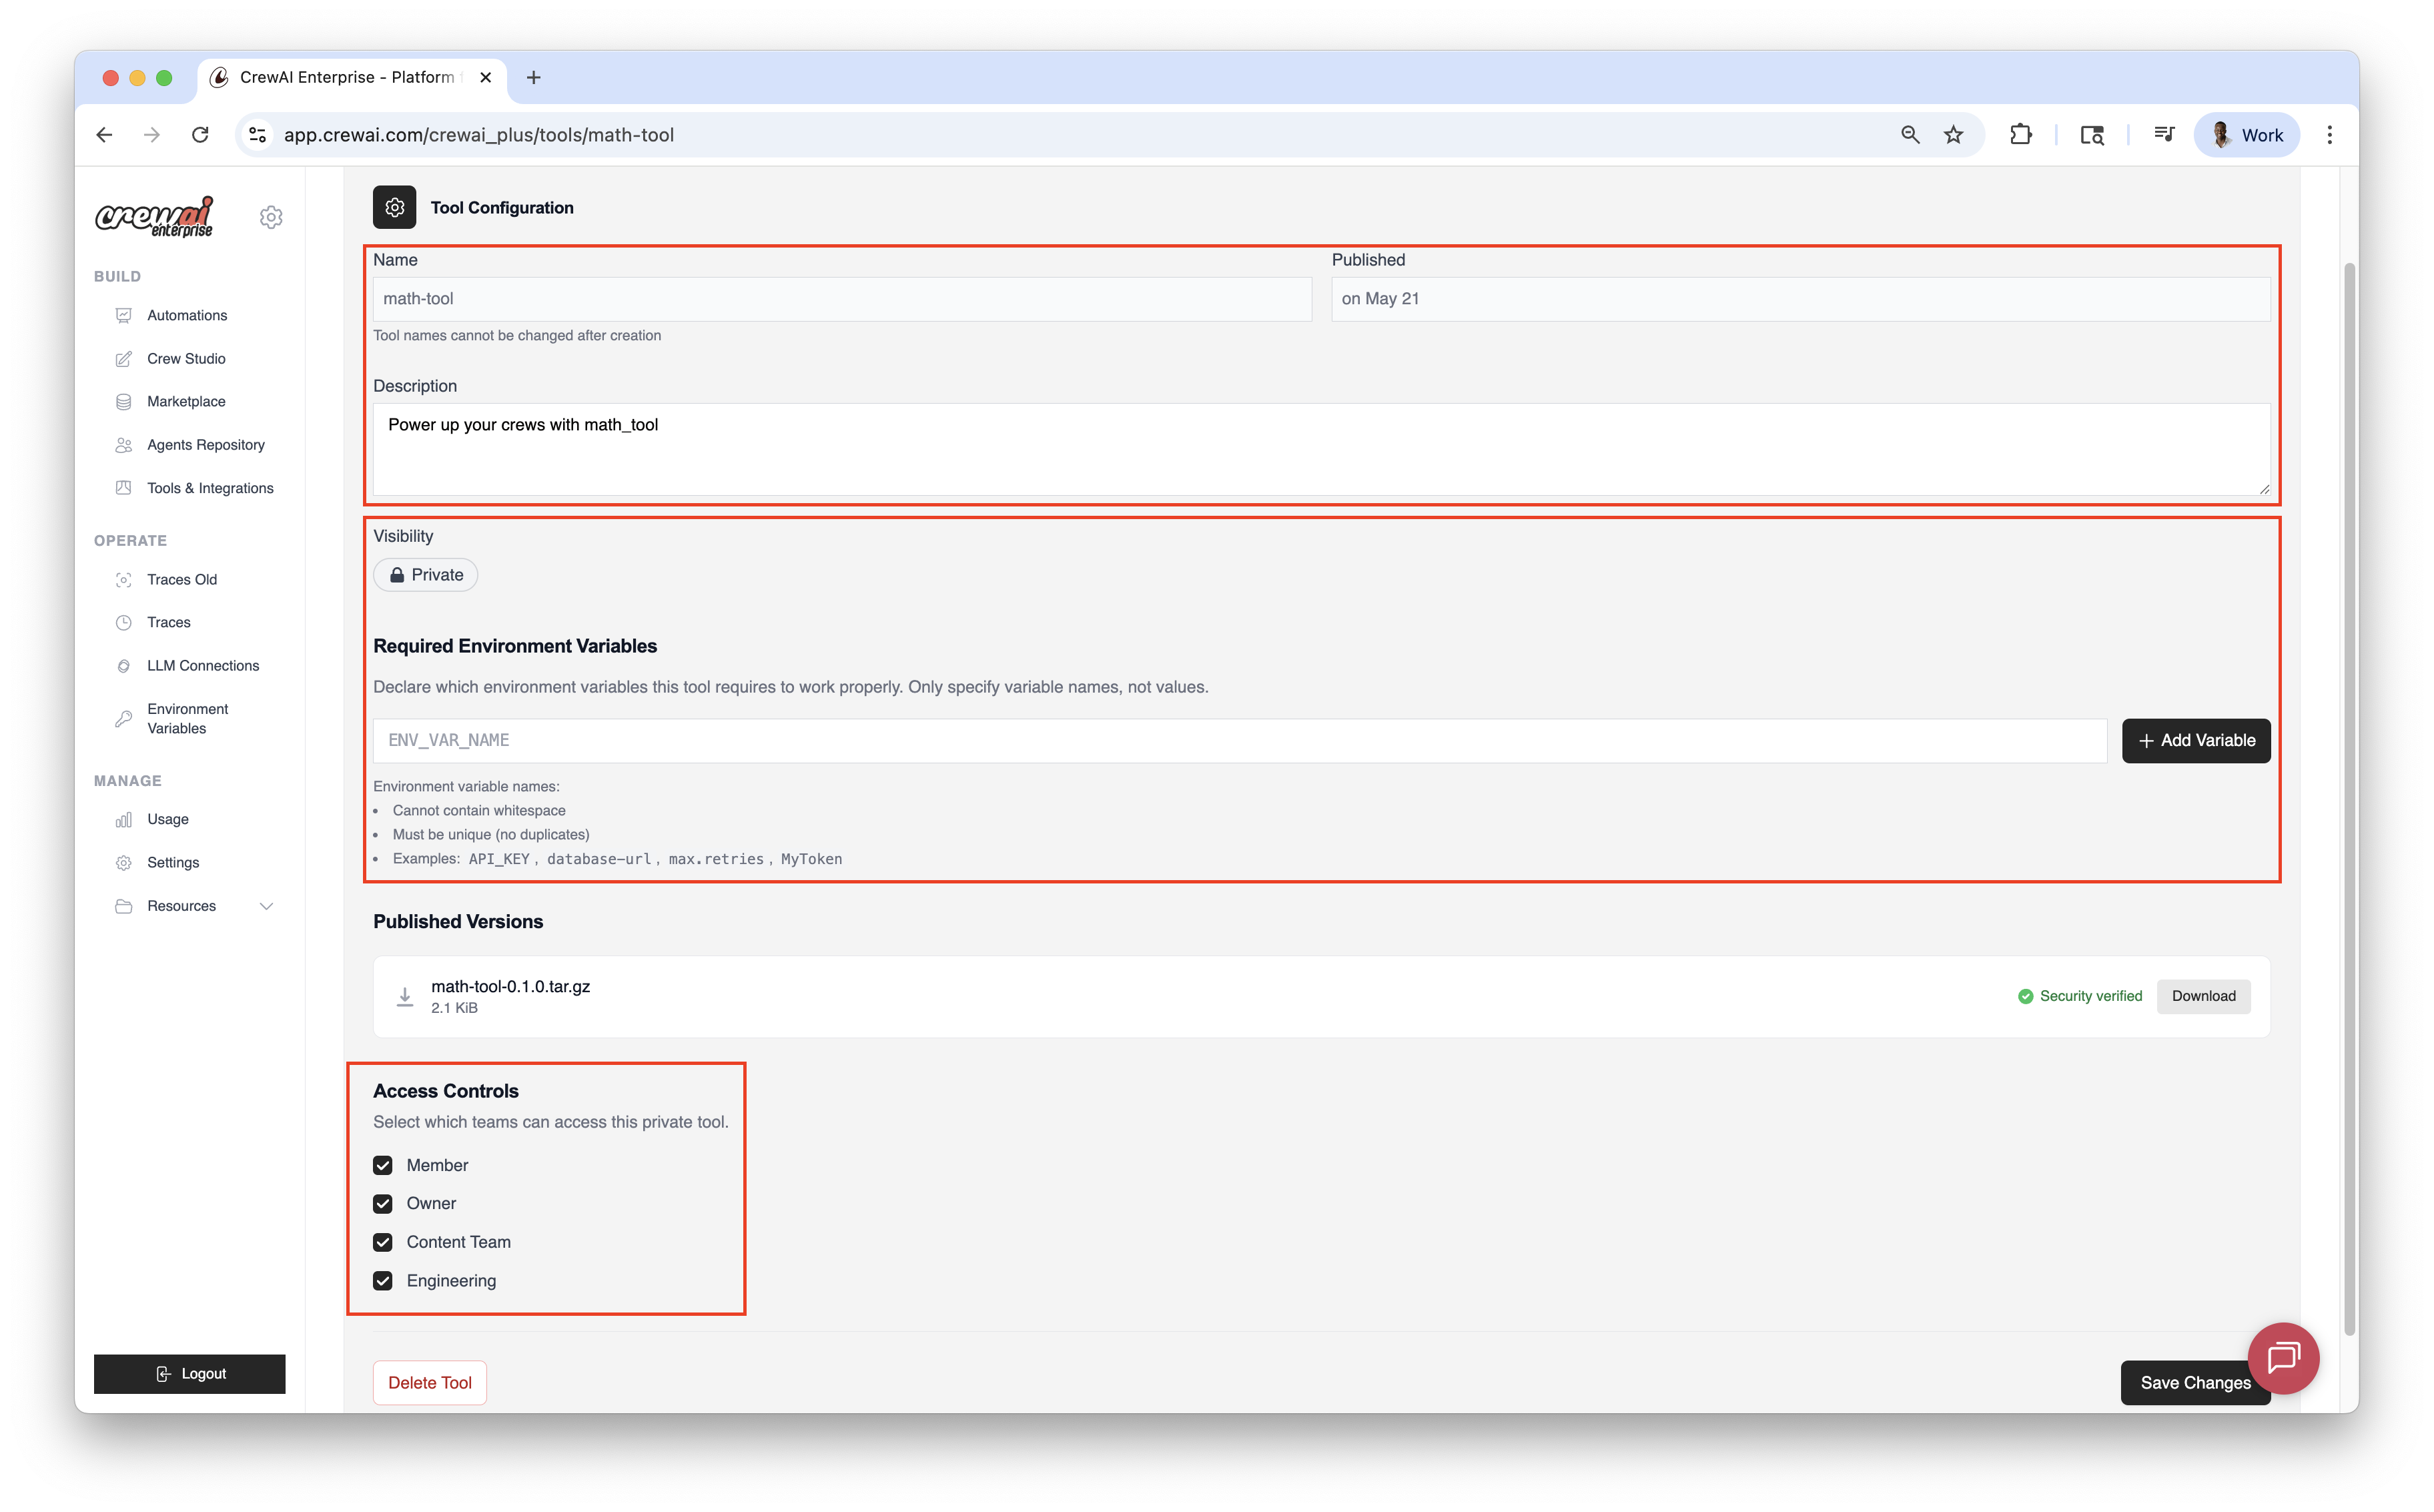
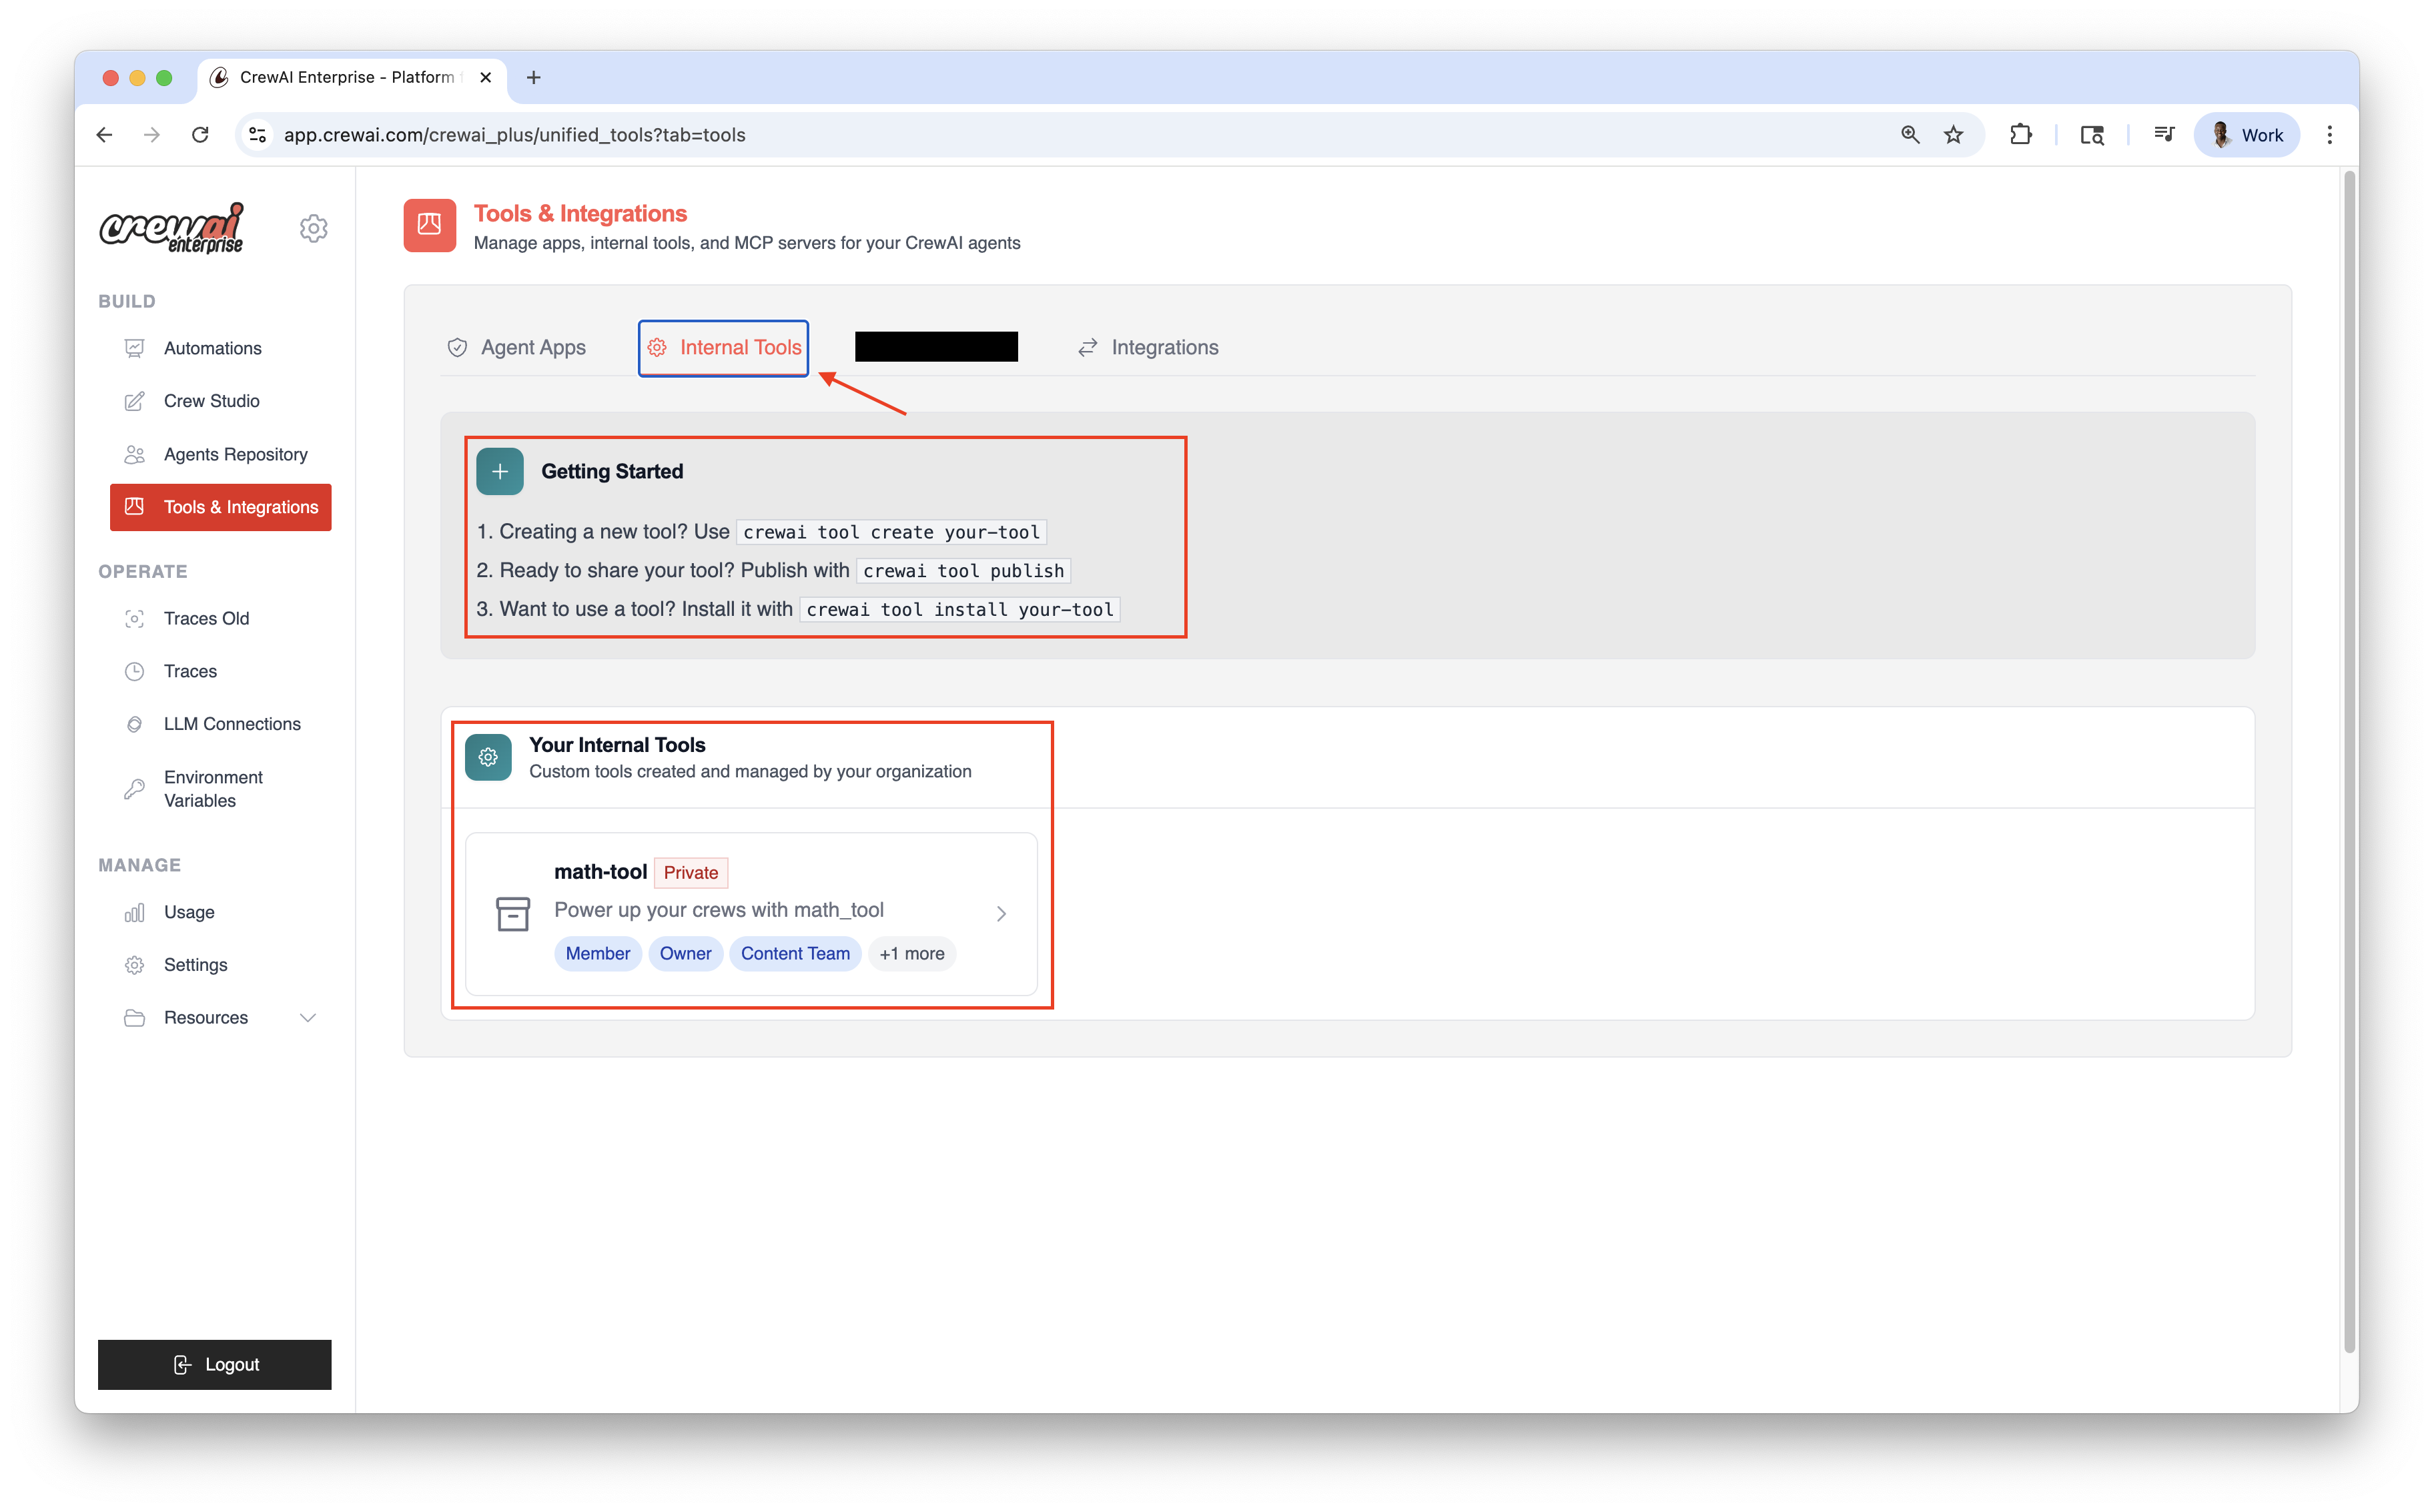
## 내부 도구
로컬에서 도구를 만들고, CrewAI AMP 도구 저장소에 게시한 후, 에이전트에서 사용하세요.
{" "}
아래 명령을 실행하기 전에 CrewAI AMP 계정에 로그인하세요: `bash crewai login`
{" "}
{" "}
로컬에서 새 도구 생성 `bash crewai tool create your-tool `
도구 저장소에 게시 `bash crewai tool publish `
도구 저장소에서 설치 `bash crewai tool install your-tool `
관리:
* 이름 및 설명
* 가시성 (비공개 / 공개)
* 필요한 환경 변수
* 버전 이력 및 다운로드
* 팀/역할 접근 권한
{" "}
## 관련 문서
크루 기능을 확장할 수 있도록 도구를 게시하고 설치하세요.
워크플로를 자동화하고 외부 플랫폼/서비스와 통합하세요.
 ## 살펴보기
 ### 계정 연결하기
1.
Integrations
로 이동
2. 원하는 서비스에서 Connect 클릭
3. OAuth 플로우 완료 및 스코프 승인
4.
통합 설정
에서 Enterprise Token 복사
{" "}
### 계정 연결하기
1.
Integrations
로 이동
2. 원하는 서비스에서 Connect 클릭
3. OAuth 플로우 완료 및 스코프 승인
4.
통합 설정
에서 Enterprise Token 복사
{" "}
 ### 통합 도구 설치
로컬에서 통합을 사용하려면 최신 `crewai-tools` 패키지를 설치하세요.
```bash theme={null}
uv add crewai-tools
```
### 환경 변수 설정
{" "}
### 통합 도구 설치
로컬에서 통합을 사용하려면 최신 `crewai-tools` 패키지를 설치하세요.
```bash theme={null}
uv add crewai-tools
```
### 환경 변수 설정
{" "}
 ### 범위 지정 배포 (다중 사용자 조직)
각 통합을 특정 사용자로 범위 지정할 수 있습니다 (예: 특정 사용자의 Gmail 계정 사용).
{" "}
### 범위 지정 배포 (다중 사용자 조직)
각 통합을 특정 사용자로 범위 지정할 수 있습니다 (예: 특정 사용자의 Gmail 계정 사용).
{" "}
 {" "}
### 카탈로그
#### 커뮤니케이션 & 협업
* Gmail — 이메일 및 초안 관리
* Slack — 워크스페이스 알림 및 경보
* Microsoft — Office 365 및 Teams 통합
#### 프로젝트 관리
* Jira — 이슈 추적 및 프로젝트 관리
* ClickUp — 작업 및 생산성 관리
* Asana — 팀 작업 조율
* Notion — 페이지 및 데이터베이스 관리
* Linear — 버그/프로젝트 추적
* GitHub — 리포지토리 및 이슈 관리
#### CRM
* Salesforce — 계정 및 기회 관리
* HubSpot — 파이프라인/연락처 관리
* Zendesk — 고객 지원 티켓 관리
#### 비즈니스 & 금융
* Stripe — 결제 처리 및 고객 관리
* Shopify — 전자상거래 및 상품 관리
#### 생산성 & 스토리지
* Google Sheets — 스프레드시트 동기화
* Google Calendar — 일정/이벤트 관리
* Box — 파일 스토리지
…더 많은 통합이 추가될 예정입니다!
{" "}
### 카탈로그
#### 커뮤니케이션 & 협업
* Gmail — 이메일 및 초안 관리
* Slack — 워크스페이스 알림 및 경보
* Microsoft — Office 365 및 Teams 통합
#### 프로젝트 관리
* Jira — 이슈 추적 및 프로젝트 관리
* ClickUp — 작업 및 생산성 관리
* Asana — 팀 작업 조율
* Notion — 페이지 및 데이터베이스 관리
* Linear — 버그/프로젝트 추적
* GitHub — 리포지토리 및 이슈 관리
#### CRM
* Salesforce — 계정 및 기회 관리
* HubSpot — 파이프라인/연락처 관리
* Zendesk — 고객 지원 티켓 관리
#### 비즈니스 & 금융
* Stripe — 결제 처리 및 고객 관리
* Shopify — 전자상거래 및 상품 관리
#### 생산성 & 스토리지
* Google Sheets — 스프레드시트 동기화
* Google Calendar — 일정/이벤트 관리
* Box — 파일 스토리지
…더 많은 통합이 추가될 예정입니다!
 {" "}
{" "}