
Overview
CrewAI Flows is a powerful feature designed to streamline the creation and management of AI workflows. Flows allow developers to combine and coordinate coding tasks and Crews efficiently, providing a robust framework for building sophisticated AI automations. Flows allow you to create structured, event-driven workflows. They provide a seamless way to connect multiple tasks, manage state, and control the flow of execution in your AI applications. With Flows, you can easily design and implement multi-step processes that leverage the full potential of CrewAI’s capabilities.- Simplified Workflow Creation: Easily chain together multiple Crews and tasks to create complex AI workflows.
- State Management: Flows make it super easy to manage and share state between different tasks in your workflow.
- Event-Driven Architecture: Built on an event-driven model, allowing for dynamic and responsive workflows.
- Flexible Control Flow: Implement conditional logic, loops, and branching within your workflows.
Getting Started
Let’s create a simple Flow where you will use OpenAI to generate a random city in one task and then use that city to generate a fun fact in another task.Code
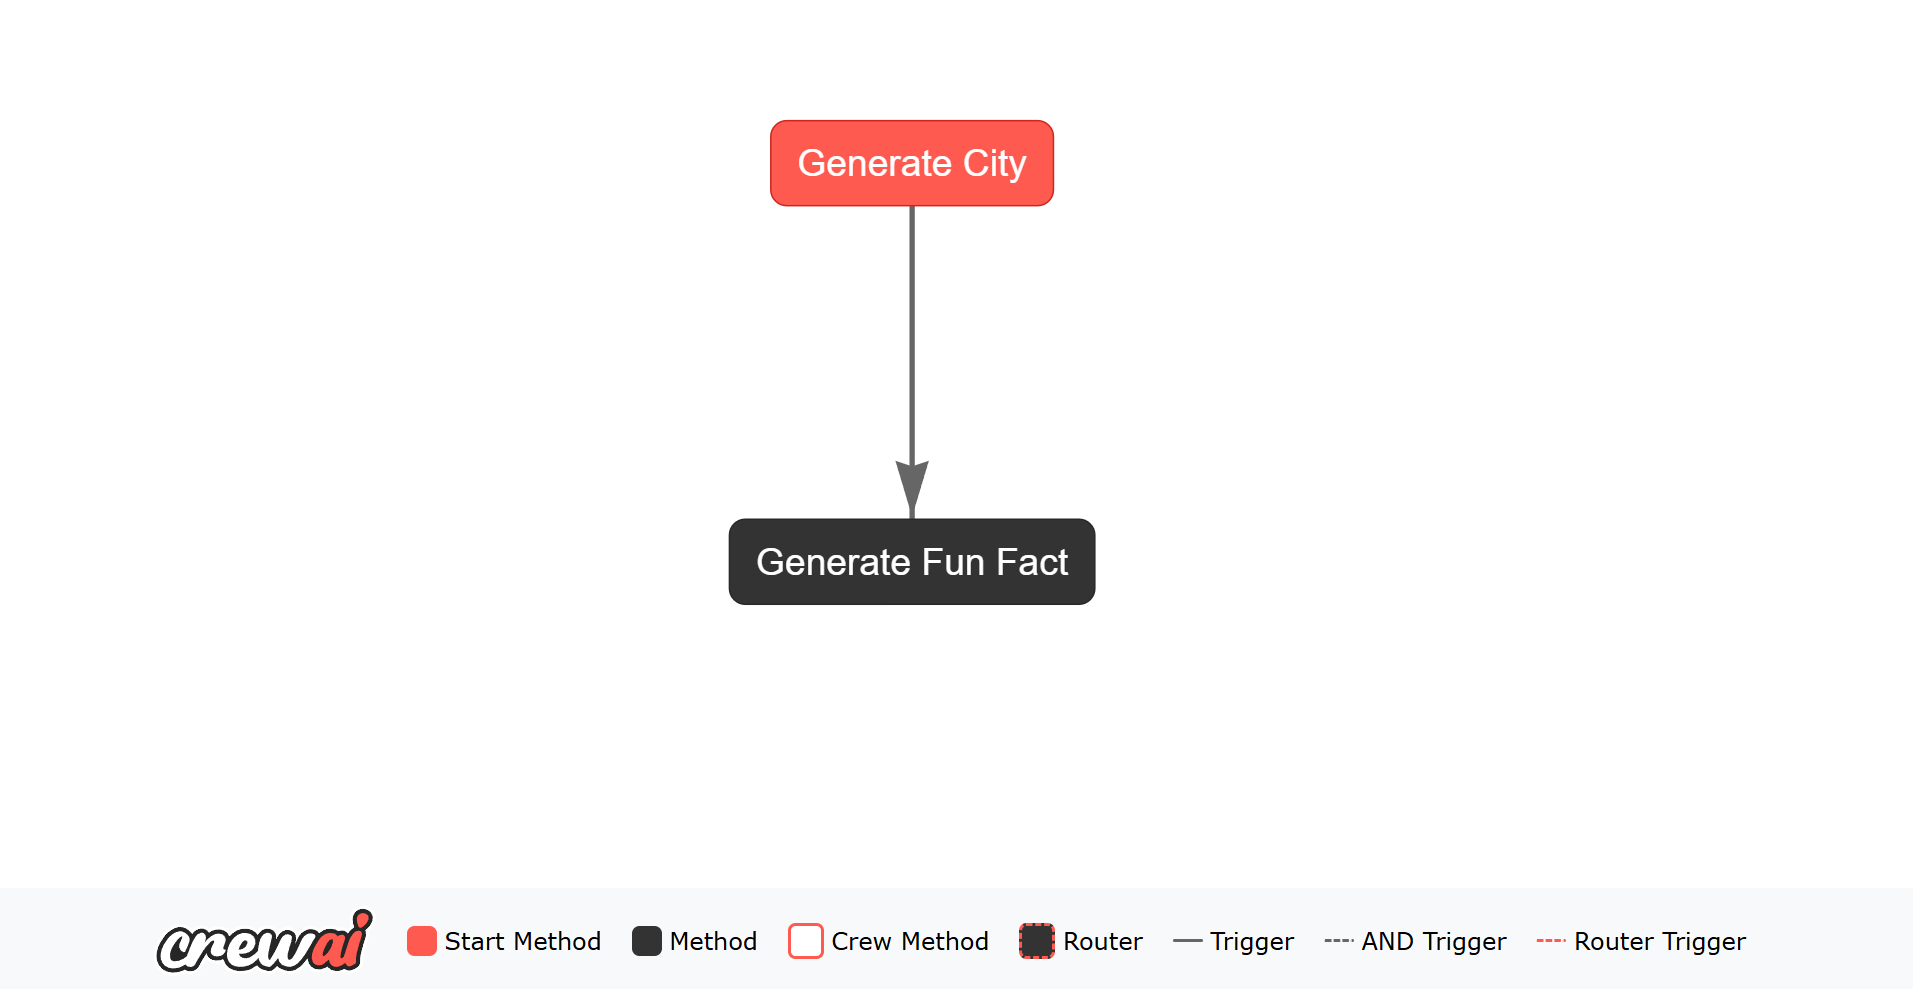
generate_city and generate_fun_fact. The generate_city task is the starting point of the Flow, and the generate_fun_fact task listens for the output of the generate_city task.
Each Flow instance automatically receives a unique identifier (UUID) in its state, which helps track and manage flow executions. The state can also store additional data (like the generated city and fun fact) that persists throughout the flow’s execution.
When you run the Flow, it will:
- Generate a unique ID for the flow state
- Generate a random city and store it in the state
- Generate a fun fact about that city and store it in the state
- Print the results to the console
.env file to store your OPENAI_API_KEY. This key is necessary for authenticating requests to the OpenAI API.
@start()
The@start() decorator marks entry points for a Flow. You can:
- Declare multiple unconditional starts:
@start() - Gate a start on a prior method or router label:
@start("method_or_label") - Provide a callable condition to control when a start should fire
@start() methods will execute (often in parallel) when the Flow begins or resumes.
@listen()
The@listen() decorator is used to mark a method as a listener for the output of another task in the Flow. The method decorated with @listen() will be executed when the specified task emits an output. The method can access the output of the task it is listening to as an argument.
Usage
The@listen() decorator can be used in several ways:
-
Listening to a Method by Name: You can pass the name of the method you want to listen to as a string. When that method completes, the listener method will be triggered.
Code
-
Listening to a Method Directly: You can pass the method itself. When that method completes, the listener method will be triggered.
Code
Flow Output
Accessing and handling the output of a Flow is essential for integrating your AI workflows into larger applications or systems. CrewAI Flows provide straightforward mechanisms to retrieve the final output, access intermediate results, and manage the overall state of your Flow.Retrieving the Final Output
When you run a Flow, the final output is determined by the last method that completes. Thekickoff() method returns the output of this final method.
Here’s how you can access the final output:
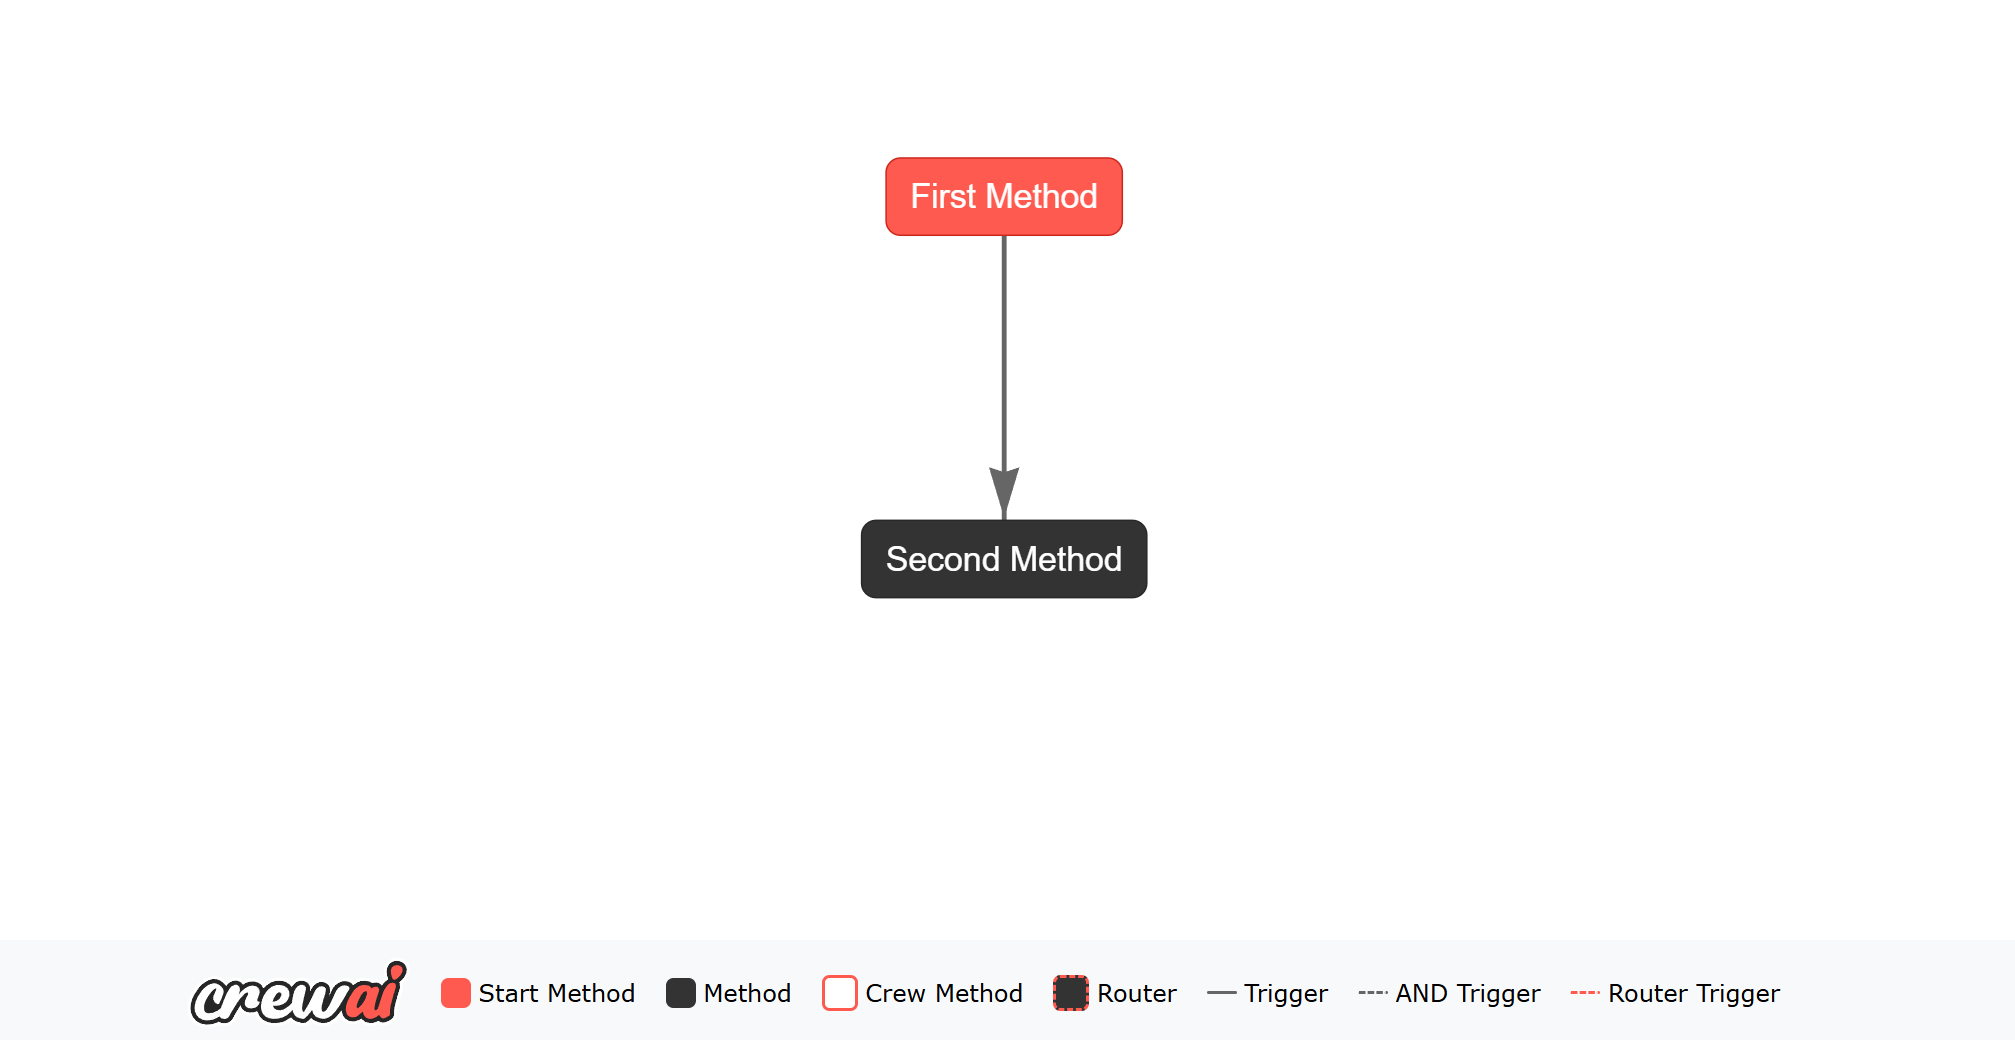
second_method is the last method to complete, so its output will be the final output of the Flow.
The kickoff() method will return the final output, which is then printed to the console. The plot() method will generate the HTML file, which will help you understand the flow.
Accessing and Updating State
In addition to retrieving the final output, you can also access and update the state within your Flow. The state can be used to store and share data between different methods in the Flow. After the Flow has run, you can access the state to retrieve any information that was added or updated during the execution. Here’s an example of how to update and access the state:first_method and second_method.
After the Flow has run, you can access the final state to see the updates made by these methods.
By ensuring that the final method’s output is returned and providing access to the state, CrewAI Flows make it easy to integrate the results of your AI workflows into larger applications or systems,
while also maintaining and accessing the state throughout the Flow’s execution.
Flow Usage Metrics
After a Flow execution completes, you can access theusage_metrics property to view aggregated token usage across every LLM call made during the run — including calls from every Crew the Flow orchestrated, calls inside Agent tools, and bare LLM.call(...) invocations from Flow methods. This is the SDK-side equivalent of the totals shown in the CrewAI Enterprise UI.
Code
flow.usage_metrics is not the same as flow.kickoff().token_usage. The
latter returns the CrewOutput.token_usage of the last @listen method
that returned a CrewOutput, which means it only reflects the final Crew and
ignores prior Crews and bare LLM.call(...) invocations entirely. Use
flow.usage_metrics whenever you need the full token rollup for the Flow
execution.UsageMetrics is the sum across all LLM calls made within a single flow.kickoff() invocation. Counters reset on the next kickoff() call (or on each iteration of kickoff_for_each), so successive runs don’t double-count. The property is safe to read at any point after kickoff() completes; reading it during execution returns the partial total accumulated so far.
Flow State Management
Managing state effectively is crucial for building reliable and maintainable AI workflows. CrewAI Flows provides robust mechanisms for both unstructured and structured state management, allowing developers to choose the approach that best fits their application’s needs.Unstructured State Management
In unstructured state management, all state is stored in thestate attribute of the Flow class.
This approach offers flexibility, enabling developers to add or modify state attributes on the fly without defining a strict schema.
Even with unstructured states, CrewAI Flows automatically generates and maintains a unique identifier (UUID) for each state instance.
Code
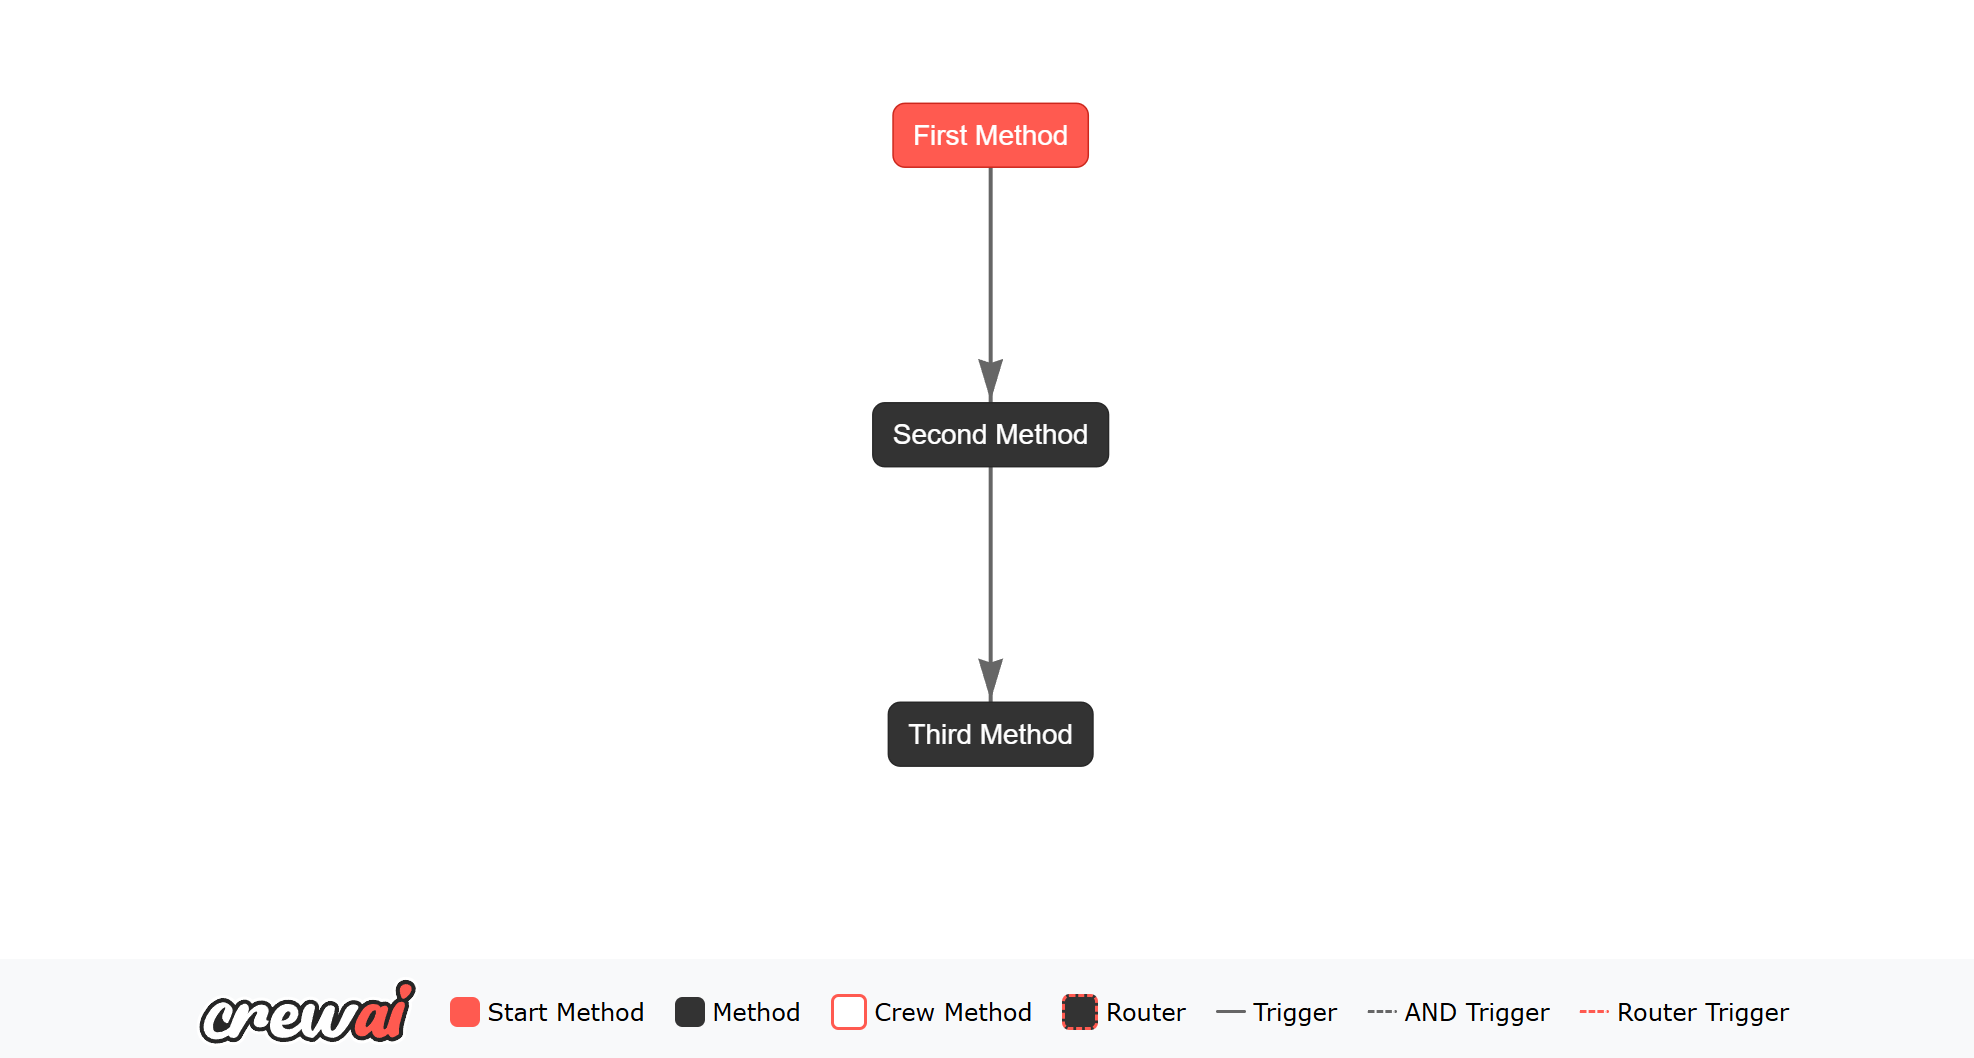
id field is automatically generated and preserved throughout the flow’s execution. You don’t need to manage or set it manually, and it will be maintained even when updating the state with new data.
Key Points:
- Flexibility: You can dynamically add attributes to
self.statewithout predefined constraints. - Simplicity: Ideal for straightforward workflows where state structure is minimal or varies significantly.
Structured State Management
Structured state management leverages predefined schemas to ensure consistency and type safety across the workflow. By using models like Pydantic’sBaseModel, developers can define the exact shape of the state, enabling better validation and auto-completion in development environments.
Each state in CrewAI Flows automatically receives a unique identifier (UUID) to help track and manage state instances. This ID is automatically generated and managed by the Flow system.
Code
- Defined Schema:
ExampleStateclearly outlines the state structure, enhancing code readability and maintainability. - Type Safety: Leveraging Pydantic ensures that state attributes adhere to the specified types, reducing runtime errors.
- Auto-Completion: IDEs can provide better auto-completion and error checking based on the defined state model.
Choosing Between Unstructured and Structured State Management
-
Use Unstructured State Management when:
- The workflow’s state is simple or highly dynamic.
- Flexibility is prioritized over strict state definitions.
- Rapid prototyping is required without the overhead of defining schemas.
-
Use Structured State Management when:
- The workflow requires a well-defined and consistent state structure.
- Type safety and validation are important for your application’s reliability.
- You want to leverage IDE features like auto-completion and type checking for better developer experience.
Flow Persistence
The @persist decorator enables automatic state persistence in CrewAI Flows, allowing you to maintain flow state across restarts or different workflow executions. This decorator can be applied at either the class level or method level, providing flexibility in how you manage state persistence.Class-Level Persistence
When applied at the class level, the @persist decorator automatically persists all flow method states:Method-Level Persistence
For more granular control, you can apply @persist to specific methods:Forking Persisted State
@persist supports two distinct hydration modes on kickoff / kickoff_async:
kickoff(inputs={"id": <uuid>})— resume: load the latest snapshot for the supplied UUID and continue writing under the sameflow_uuid. The history extends.kickoff(restore_from_state_id=<uuid>)— fork: load the latest snapshot for the supplied UUID, hydrate the new run’s state from it, and assign a freshstate.id(auto-generated, orinputs["id"]if pinned). The new run’s@persistwrites land under the newstate.id; the source flow’s history is preserved.
restore_from_state_id does not match any persisted state, the kickoff falls back silently — same as the existing inputs["id"] resume not-found behavior. Combining restore_from_state_id with from_checkpoint raises a ValueError; pick one hydration source. Pinning inputs["id"] while forking shares a persistence key with another flow — usually you want only restore_from_state_id.
How It Works
-
Unique State Identification
- Each flow state automatically receives a unique UUID
- The ID is preserved across state updates and method calls
- Supports both structured (Pydantic BaseModel) and unstructured (dictionary) states
-
Default SQLite Backend
- SQLiteFlowPersistence is the default storage backend
- States are automatically saved to a local SQLite database
- Robust error handling ensures clear messages if database operations fail
-
Error Handling
- Comprehensive error messages for database operations
- Automatic state validation during save and load
- Clear feedback when persistence operations encounter issues
Important Considerations
- State Types: Both structured (Pydantic BaseModel) and unstructured (dictionary) states are supported
- Automatic ID: The
idfield is automatically added if not present - State Recovery: Failed or restarted flows can automatically reload their previous state
- Custom Implementation: You can provide your own FlowPersistence implementation for specialized storage needs
Technical Advantages
-
Precise Control Through Low-Level Access
- Direct access to persistence operations for advanced use cases
- Fine-grained control via method-level persistence decorators
- Built-in state inspection and debugging capabilities
- Full visibility into state changes and persistence operations
-
Enhanced Reliability
- Automatic state recovery after system failures or restarts
- Transaction-based state updates for data integrity
- Comprehensive error handling with clear error messages
- Robust validation during state save and load operations
-
Extensible Architecture
- Customizable persistence backend through FlowPersistence interface
- Support for specialized storage solutions beyond SQLite
- Compatible with both structured (Pydantic) and unstructured (dict) states
- Seamless integration with existing CrewAI flow patterns
Flow Control
Conditional Logic: or
The or_ function in Flows allows you to listen to multiple methods and trigger the listener method when any of the specified methods emit an output.
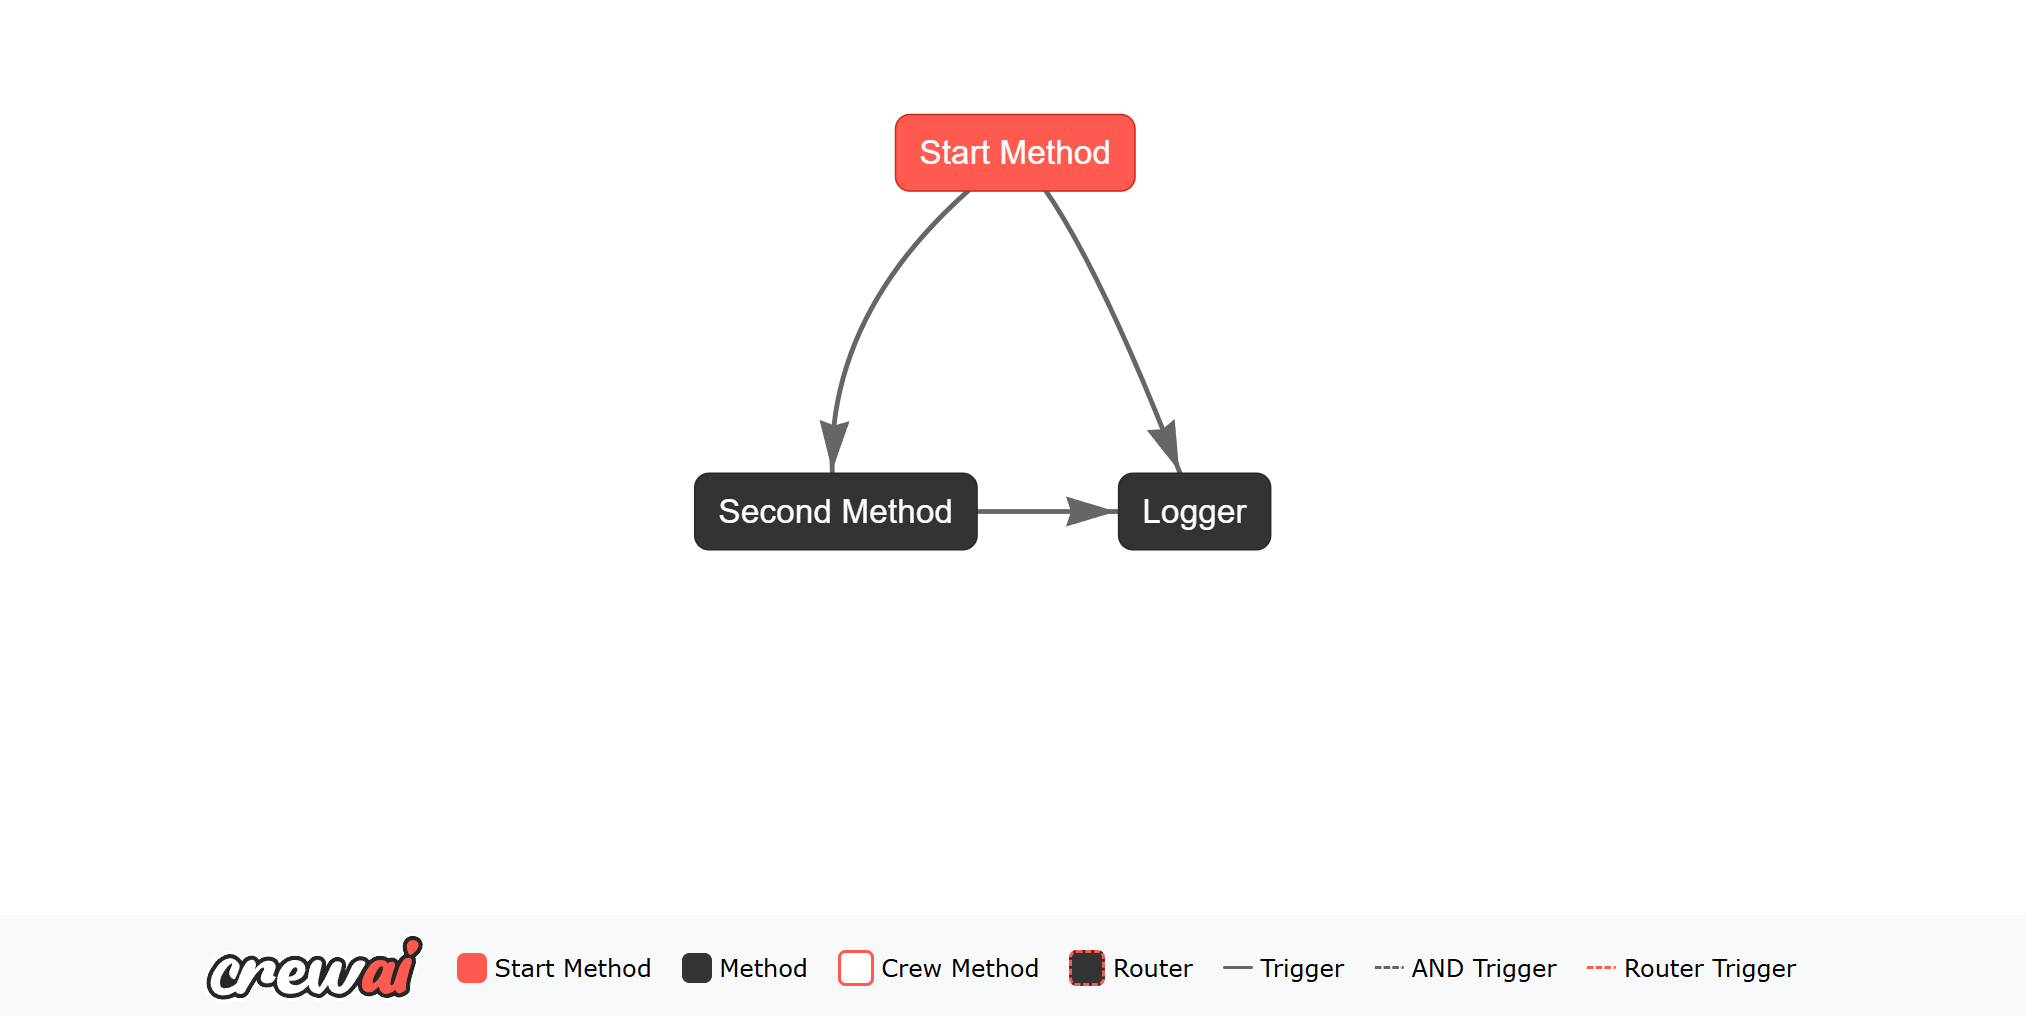
logger method will be triggered by the output of either the start_method or the second_method.
The or_ function is used to listen to multiple methods and trigger the listener method when any of the specified methods emit an output.
Conditional Logic: and
The and_ function in Flows allows you to listen to multiple methods and trigger the listener method only when all the specified methods emit an output.
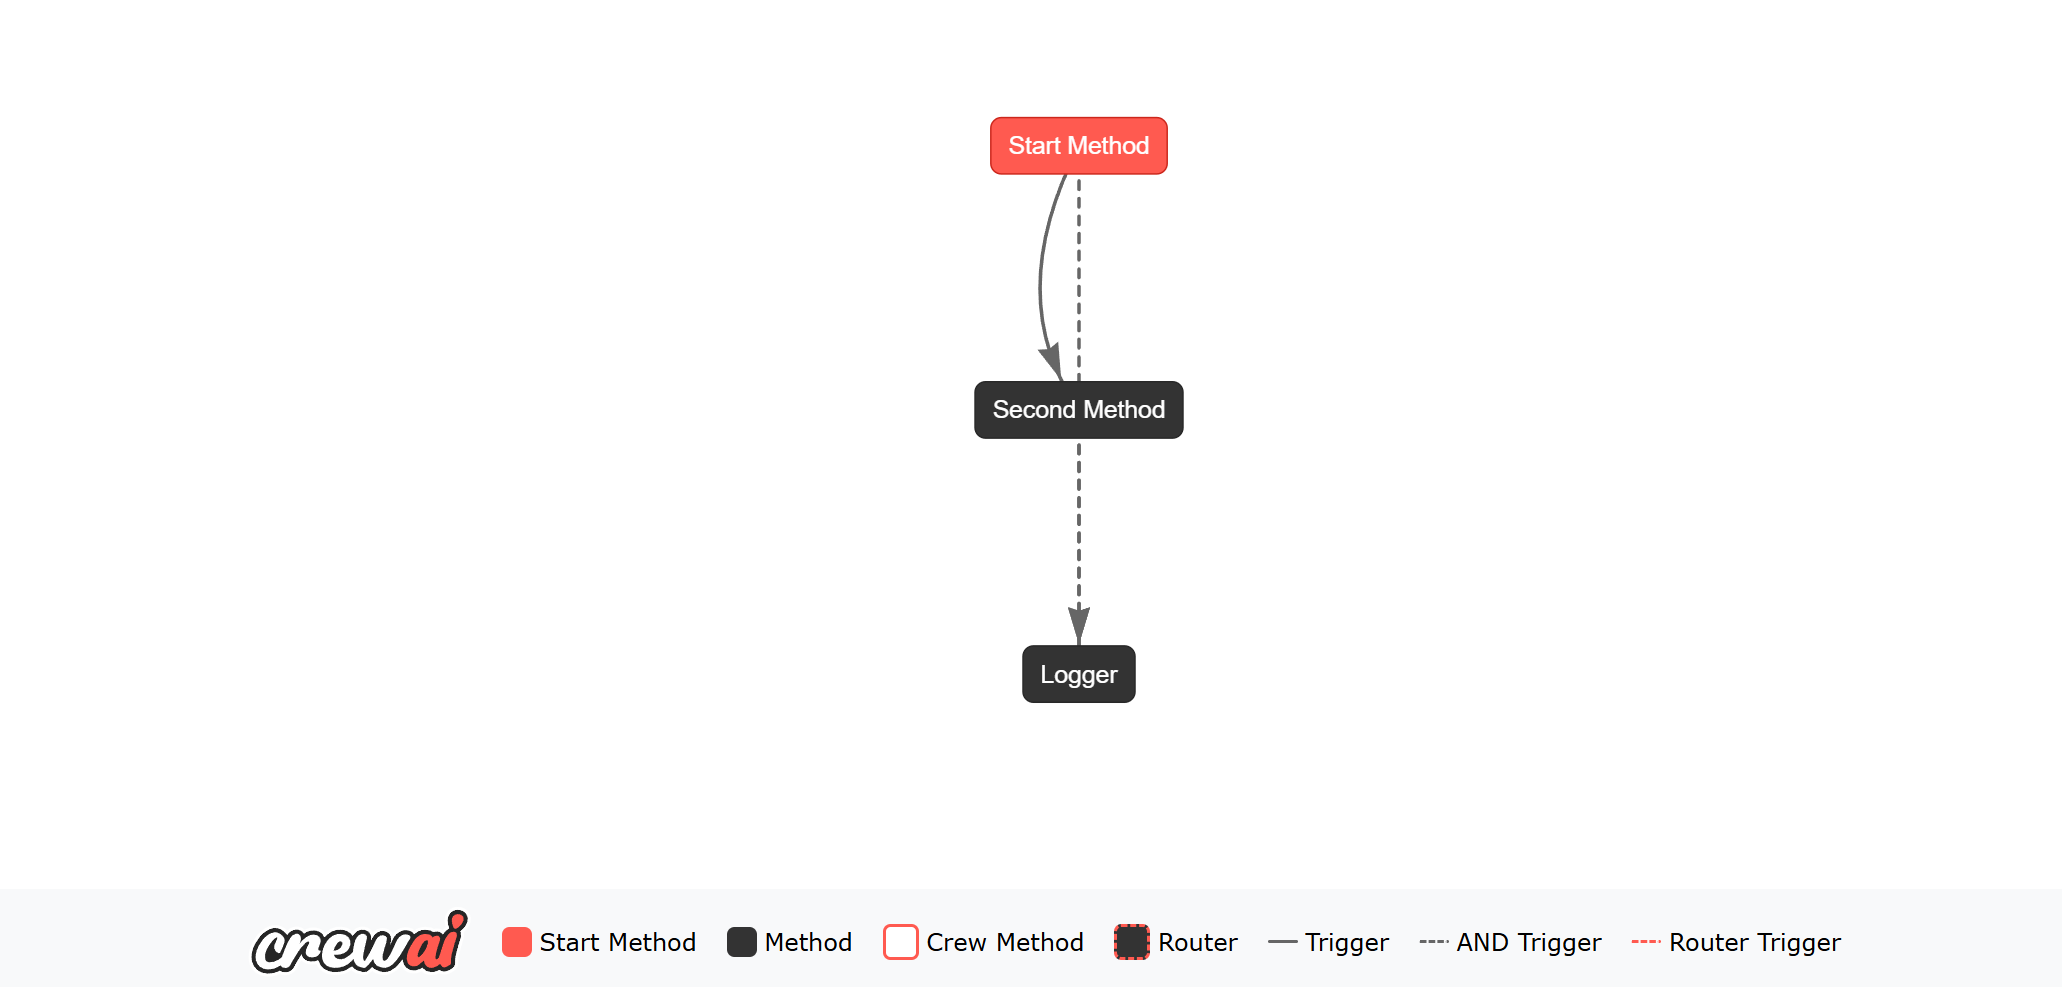
logger method will be triggered only when both the start_method and the second_method emit an output.
The and_ function is used to listen to multiple methods and trigger the listener method only when all the specified methods emit an output.
Router
The@router() decorator in Flows allows you to define conditional routing logic based on the output of a method.
You can specify different routes based on the output of the method, allowing you to control the flow of execution dynamically.
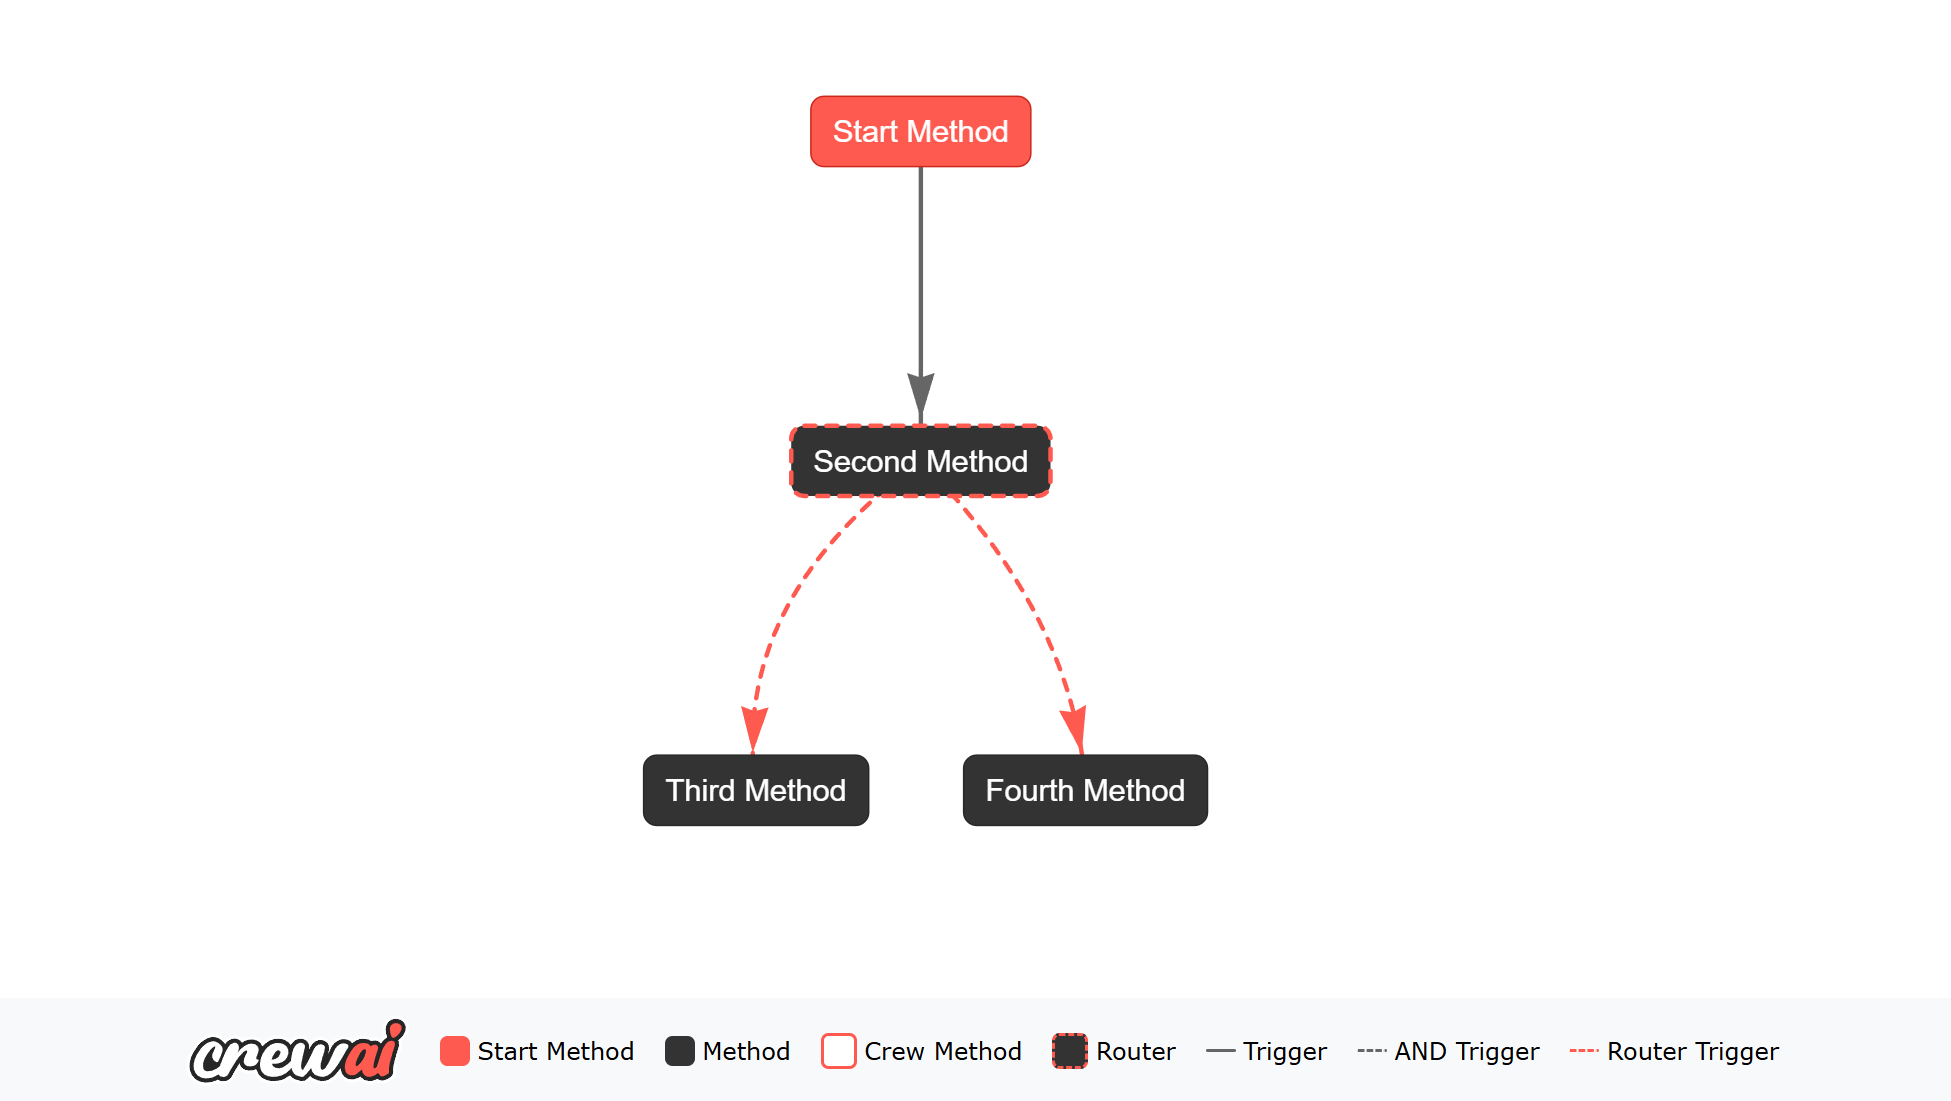
start_method generates a random boolean value and sets it in the state.
The second_method uses the @router() decorator to define conditional routing logic based on the value of the boolean.
If the boolean is True, the method returns "success", and if it is False, the method returns "failed".
The third_method and fourth_method listen to the output of the second_method and execute based on the returned value.
When you run this Flow, the output will change based on the random boolean value generated by the start_method.
Human in the Loop (human feedback)
The
@human_feedback decorator requires CrewAI version 1.8.0 or higher.@human_feedback decorator enables human-in-the-loop workflows by pausing flow execution to collect feedback from a human. This is useful for approval gates, quality review, and decision points that require human judgment.
Code
emit is specified, the human’s free-form feedback is interpreted by an LLM and collapsed into one of the specified outcomes, which then triggers the corresponding @listen decorator.
You can also use @human_feedback without routing to simply collect feedback:
Code
self.last_human_feedback (most recent) or self.human_feedback_history (all feedback as a list).
For a complete guide on human feedback in flows, including async/non-blocking feedback with custom providers (Slack, webhooks, etc.), see Human Feedback in Flows.
Adding Agents to Flows
Agents can be seamlessly integrated into your flows, providing a lightweight alternative to full Crews when you need simpler, focused task execution. Here’s an example of how to use an Agent within a flow to perform market research: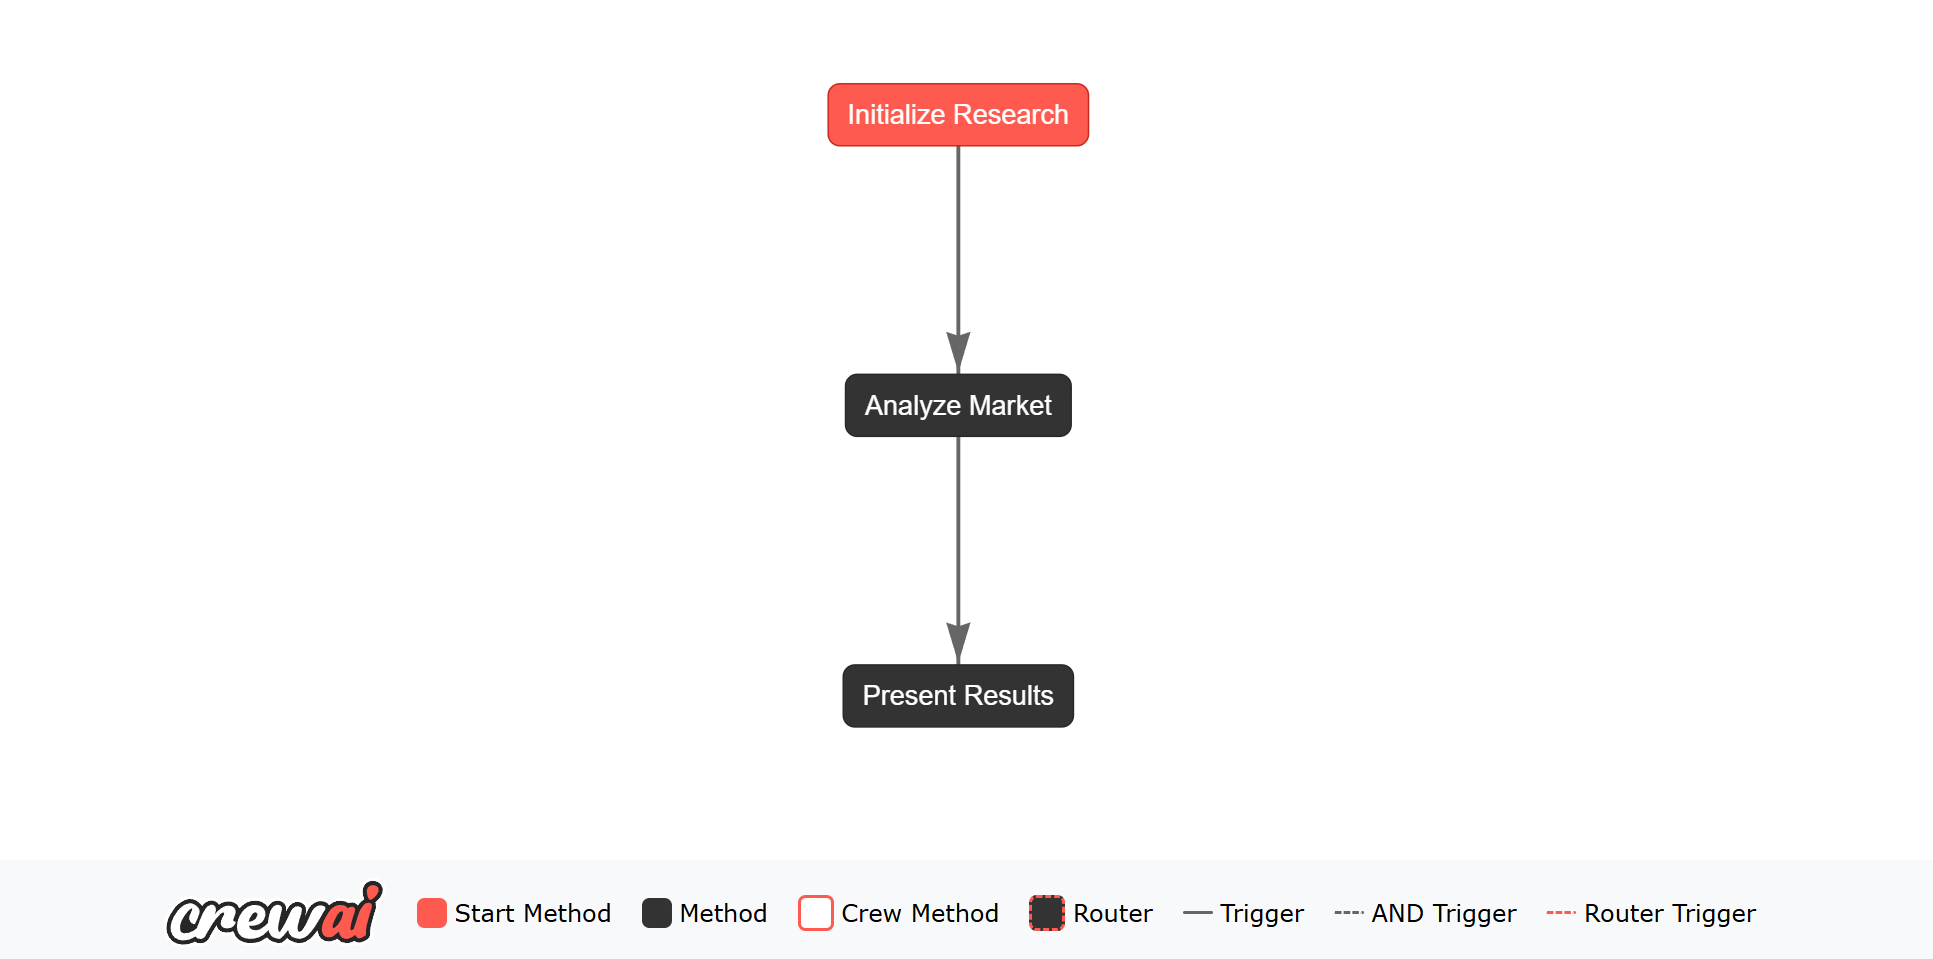
-
Structured Output: Using Pydantic models to define the expected output format (
MarketAnalysis) ensures type safety and structured data throughout the flow. -
State Management: The flow state (
MarketResearchState) maintains context between steps and stores both inputs and outputs. -
Tool Integration: Agents can use tools (like
WebsiteSearchTool) to enhance their capabilities.
Adding Crews to Flows
Creating a flow with multiple crews in CrewAI is straightforward. You can generate a new CrewAI project that includes all the scaffolding needed to create a flow with multiple crews by running the following command:poem_crew that is already working. The starter embedded crew uses the classic Python/YAML layout; new standalone crews created with crewai create crew use the JSON-first layout.
Folder Structure
After running thecrewai create flow name_of_flow command, you will see a folder structure similar to the following:
Building Your Crews
In thecrews folder, you can define multiple crews. The generated poem_crew uses the classic embedded-crew structure:
config/agents.yaml: Defines the agents for the crew.config/tasks.yaml: Defines the tasks for the crew.poem_crew.py: Contains the crew definition, including agents, tasks, and the crew itself.
poem_crew to create other classic embedded crews.
For JSON-first embedded crews, use a folder with crew.jsonc and agents/*.jsonc instead:
Connecting Crews in main.py
The main.py file is where you create your flow and connect the crews together. You can define your flow by using the Flow class and the decorators @start and @listen to specify the flow of execution.
Here’s an example of how you can connect the poem_crew in the main.py file:
Code
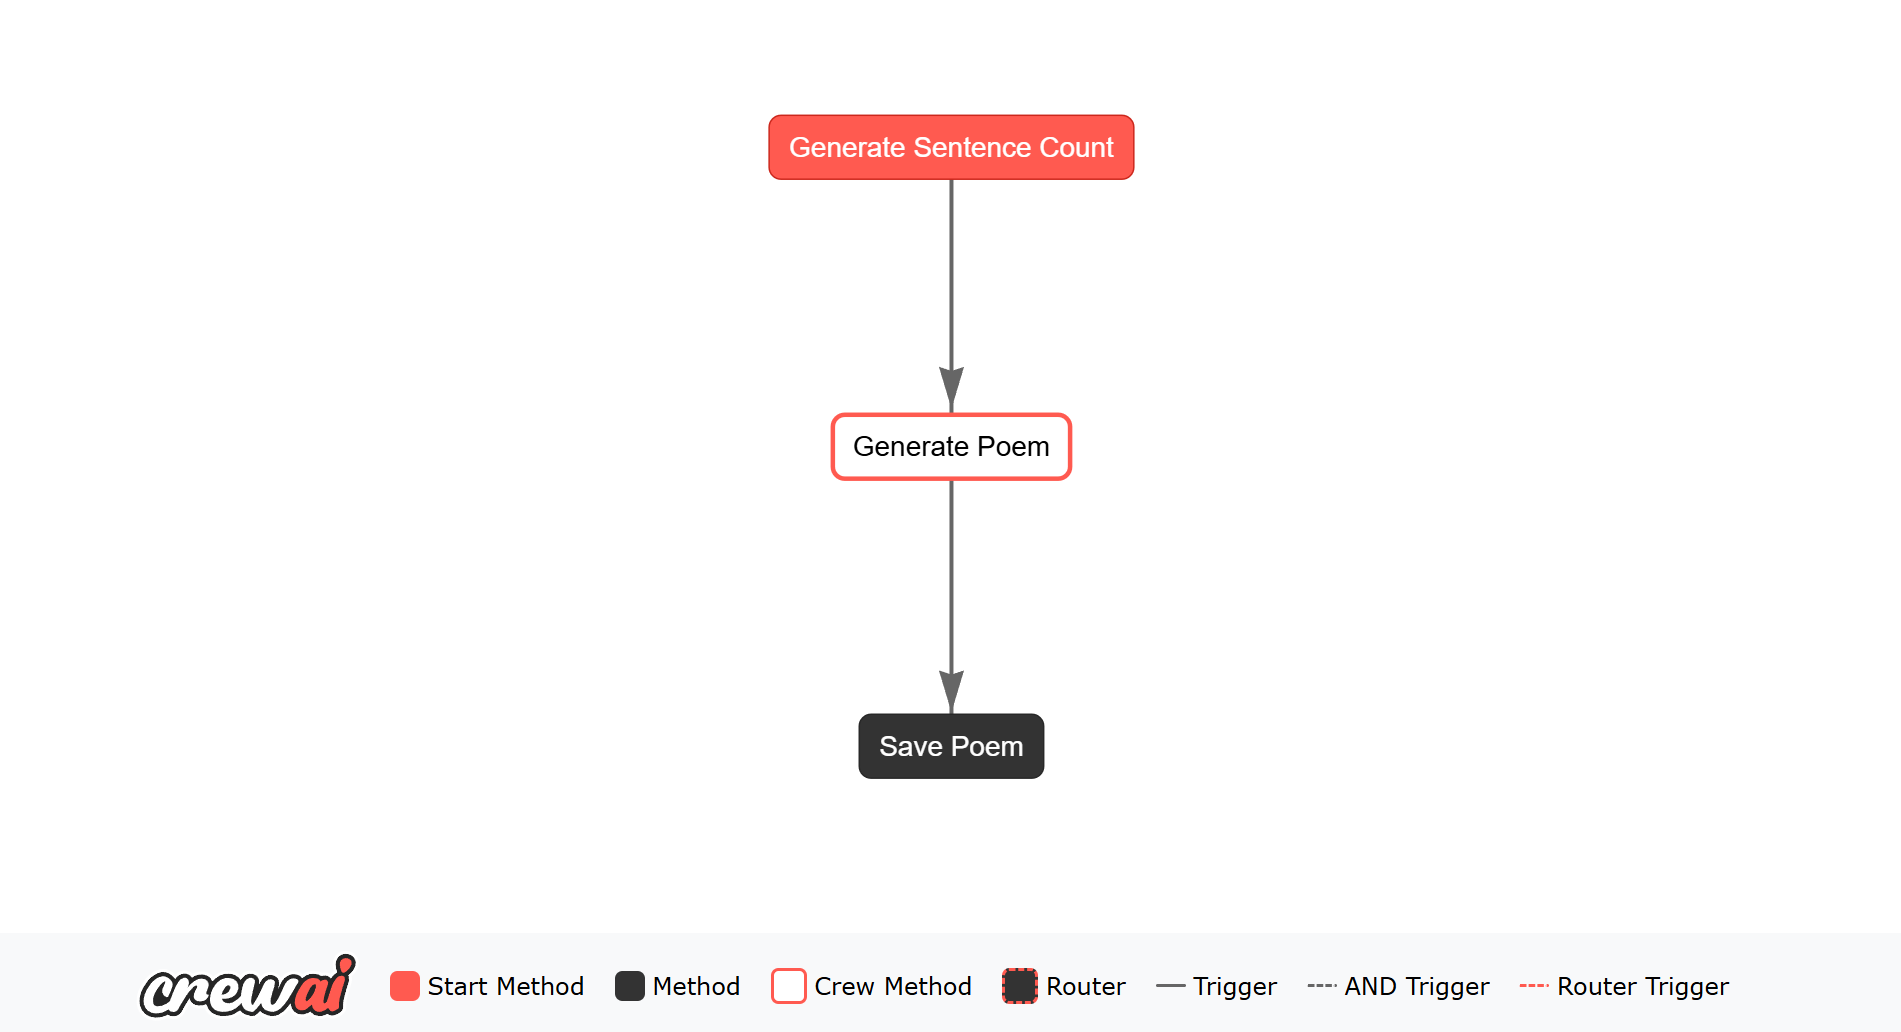
PoemFlow class defines a flow that generates a sentence count, uses the PoemCrew to generate a poem, and then saves the poem to a file. The flow is kicked off by calling the kickoff() method. The PoemFlowPlot will be generated by plot() method.
Running the Flow
(Optional) Before running the flow, you can install the dependencies by running:Plot Flows
Visualizing your AI workflows can provide valuable insights into the structure and execution paths of your flows. CrewAI offers a powerful visualization tool that allows you to generate interactive plots of your flows, making it easier to understand and optimize your AI workflows.What are Plots?
Plots in CrewAI are graphical representations of your AI workflows. They display the various tasks, their connections, and the flow of data between them. This visualization helps in understanding the sequence of operations, identifying bottlenecks, and ensuring that the workflow logic aligns with your expectations.How to Generate a Plot
CrewAI provides two convenient methods to generate plots of your flows:Option 1: Using the plot() Method
If you are working directly with a flow instance, you can generate a plot by calling the plot() method on your flow object. This method will create an HTML file containing the interactive plot of your flow.
Code
my_flow_plot.html in your current directory. You can open this file in a web browser to view the interactive plot.
Option 2: Using the Command Line
If you are working within a structured CrewAI project, you can generate a plot using the command line. This is particularly useful for larger projects where you want to visualize the entire flow setup.plot() method. The file will be saved in your project directory, and you can open it in a web browser to explore the flow.
Understanding the Plot
The generated plot will display nodes representing the tasks in your flow, with directed edges indicating the flow of execution. The plot is interactive, allowing you to zoom in and out, and hover over nodes to see additional details. By visualizing your flows, you can gain a clearer understanding of the workflow’s structure, making it easier to debug, optimize, and communicate your AI processes to others.Conclusion
Plotting your flows is a powerful feature of CrewAI that enhances your ability to design and manage complex AI workflows. Whether you choose to use theplot() method or the command line, generating plots will provide you with a visual representation of your workflows, aiding in both development and presentation.
Next Steps
If you’re interested in exploring additional examples of flows, we have a variety of recommendations in our examples repository. Here are four specific flow examples, each showcasing unique use cases to help you match your current problem type to a specific example:- Email Auto Responder Flow: This example demonstrates an infinite loop where a background job continually runs to automate email responses. It’s a great use case for tasks that need to be performed repeatedly without manual intervention. View Example
- Lead Score Flow: This flow showcases adding human-in-the-loop feedback and handling different conditional branches using the router. It’s an excellent example of how to incorporate dynamic decision-making and human oversight into your workflows. View Example
- Write a Book Flow: This example excels at chaining multiple crews together, where the output of one crew is used by another. Specifically, one crew outlines an entire book, and another crew generates chapters based on the outline. Eventually, everything is connected to produce a complete book. This flow is perfect for complex, multi-step processes that require coordination between different tasks. View Example
- Meeting Assistant Flow: This flow demonstrates how to broadcast one event to trigger multiple follow-up actions. For instance, after a meeting is completed, the flow can update a Trello board, send a Slack message, and save the results. It’s a great example of handling multiple outcomes from a single event, making it ideal for comprehensive task management and notification systems. View Example
Running Flows
There are two ways to run a flow:Using the Flow API
You can run a flow programmatically by creating an instance of your flow class and calling thekickoff() method:
Streaming Flow Execution
For real-time visibility into flow execution, you can enable streaming to receive output as it’s generated:Memory in Flows
Every Flow automatically has access to CrewAI’s unified Memory system. You can store, recall, and extract memories directly inside any flow method using three built-in convenience methods.Built-in Methods
A default
Memory() instance is created automatically when the Flow initializes. You can also pass a custom one:
Example: Research and Analyze Flow
analyze step will recall findings from previous executions too — enabling flows that learn and accumulate knowledge over time.
See the Memory documentation for details on scopes, slices, composite scoring, embedder configuration, and more.
Using the CLI
Starting from version 0.103.0, you can run flows using thecrewai run command:
type = "flow" setting in your pyproject.toml) and runs it accordingly. This is the recommended way to run flows from the command line.
The legacy crewai flow kickoff command is deprecated. Use crewai run for both crews and flows.